HA HA HA You guys are just tooooooooo funny!!:roll: The both of you should take that show on the road, you’d make millions:mrgreen:
(I took the pics before the surveyors got there)
To answer your question Marcel, once the hole is ready we have the surveyors come in and actually layout the building with stakes &/or re-bar pins. This way the form guys shouldn’t have any questions. Then once the footings are poured the surveyors come back and they’ll pin the footings (survey nails in the corners). The architect has all the elevations for the footings, slab, top of foundation, brick shelf, etc. labeled on the plans. He sends that info to the engineers who calculate the coordinates and then sends the surveyors out to stake / pin the hole for us.
It keeps my behind out of the frying pan, if you know what I mean! Only made that mistake once and we had to get a variance for 6 inches of a 10’ section of a house that was outside the building envelope.
I’ll take some pics in the morning and post them tomorrow.
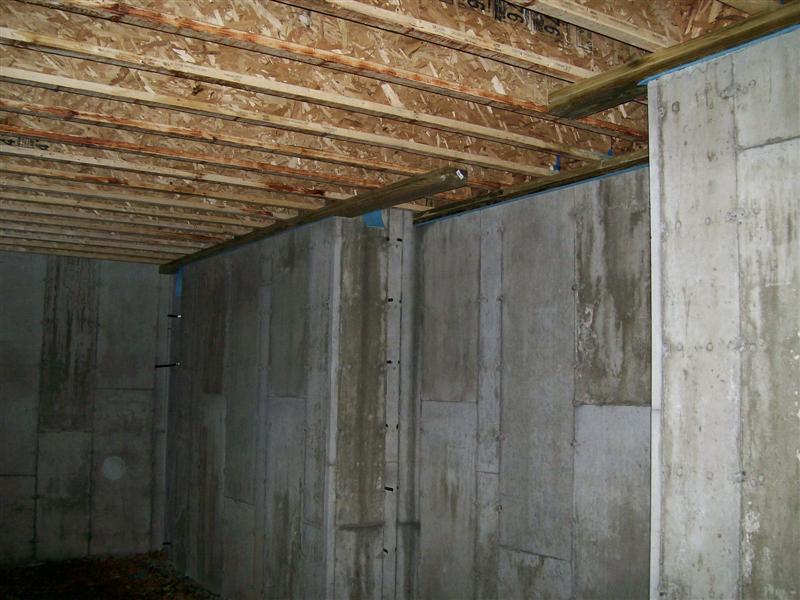
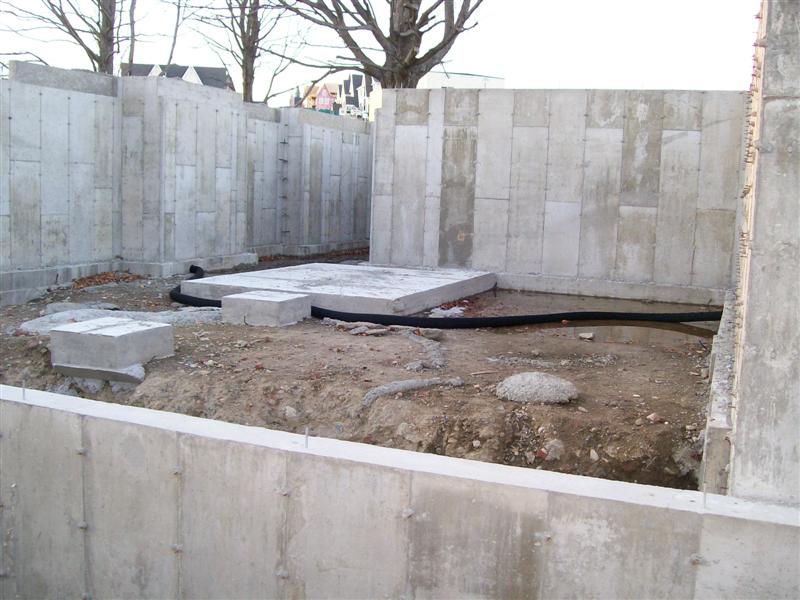
This is how the joist shelf looks completed (check out ist pic in reply #21, the before pic). We did it this way to keep the height of the first floor lower, which in turns allows us to only have 2 steps out the door to grade (over age 55 subdivision).
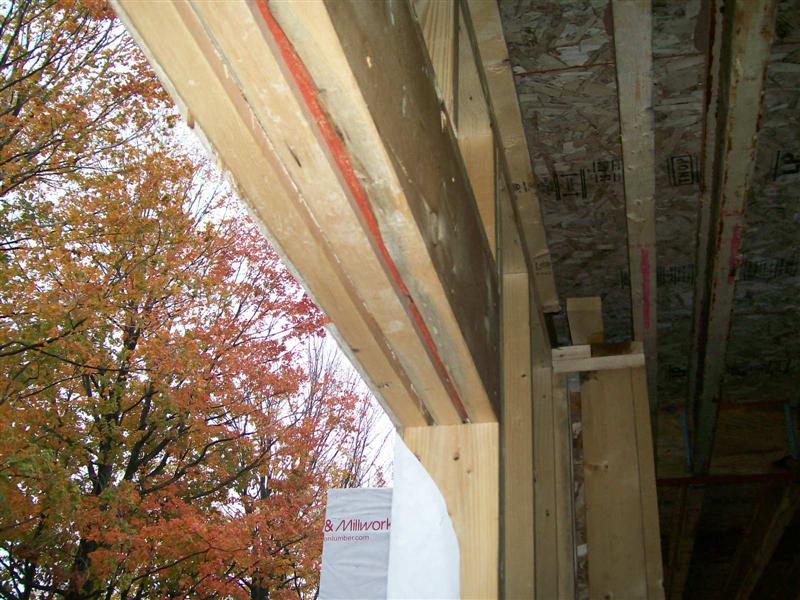
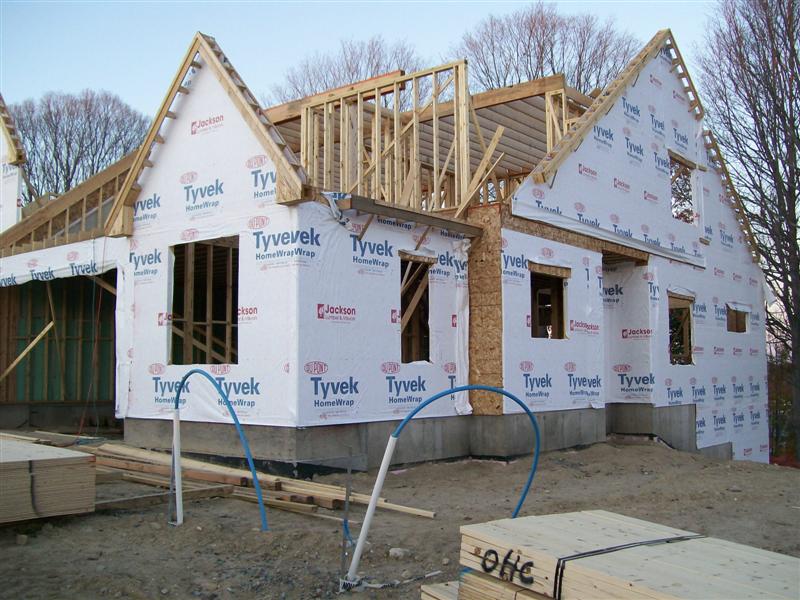
Window header for a triple mullion on the back exterior wall of the lower unit. Triple 2 x 10’s with 1/2" plywood sandwiched in between for a 2 x 6 wall.
View of the rear of the building. As you can see why the need for the microlam header listed above, there’s a lot of weight coming down for those big openings. The opening on the first floor is for 6’ sliders.
Absolutely Marcel, The surveyors we use even have everything connected with GPS. They surely should make a mistake as to the location:), one would hope!!:shock:
That is right Alan, and we five years ago invested or my Boss did, in a all station machine and now do it ourselves in the field and save up to $3000 on every job. One of the project managers has learned on how to use it and works great.
The last job I did with a surveyor, made a 3" mistake that I found with my conventional transit and using the old school method.
I was not a happy camper and neither was my Boss when he found out and called me up and asked why his building was out of square with an original building.
My response, was, you hired them because they are insured so what is the problem>
I have laid out my own buildings for thirty years and never had a problem so next time you might want to do it ourselves.
That is when he bought the machine.
I told him that I learned surveying so long ago the old fashion way that I did not have the time to start a new.
That gave the job to a younger interested project manager and I was happy.
Works great.
Thanks Alan and keep those post coming. We are bound to help a few here wether they like it or not.
Thanks Marcel, I will. This is what it’s all about, passing on valuable information to others! I hope everyone finds it interesting and valuable, I know I do. Having only managed subdivisions of single family homes, I have found the construction of condos / multi family units similar in some respect yet different in others. Quite enjoyable and interesting nonetheless.
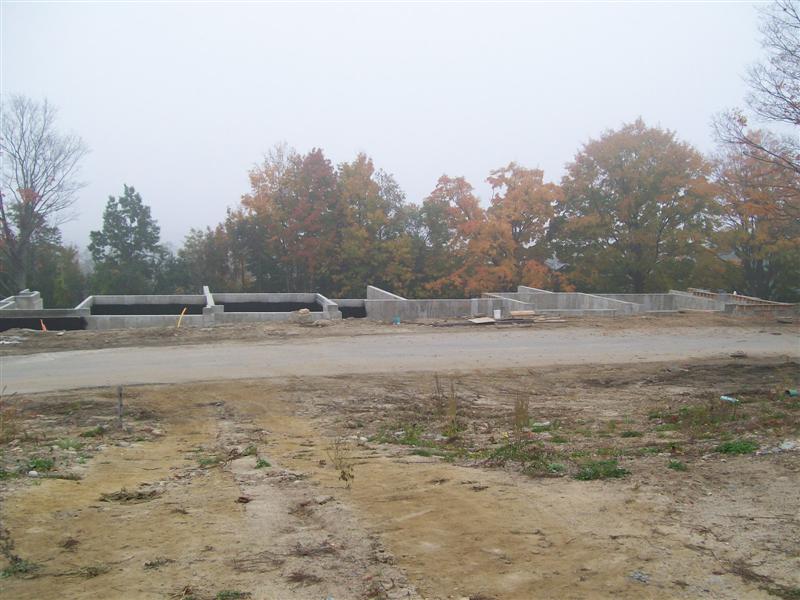
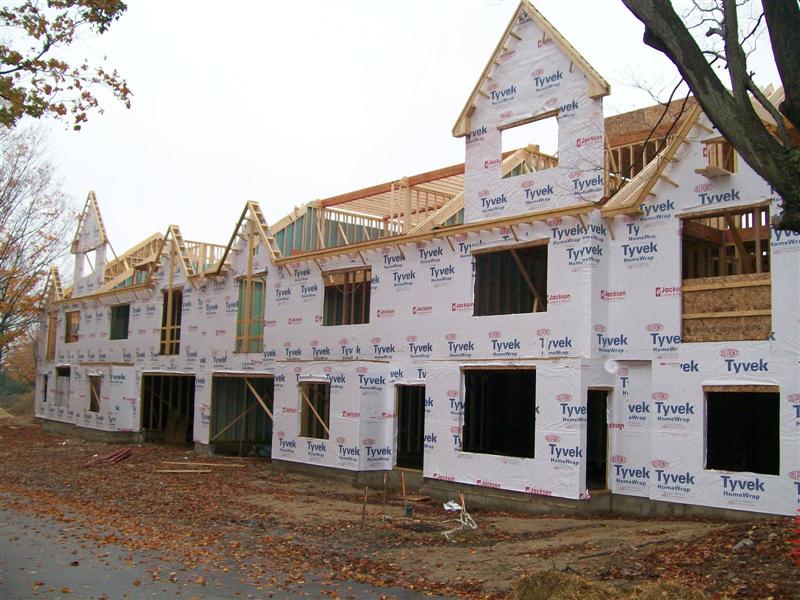
Here’s the current update on one of the three buildings under way so far.
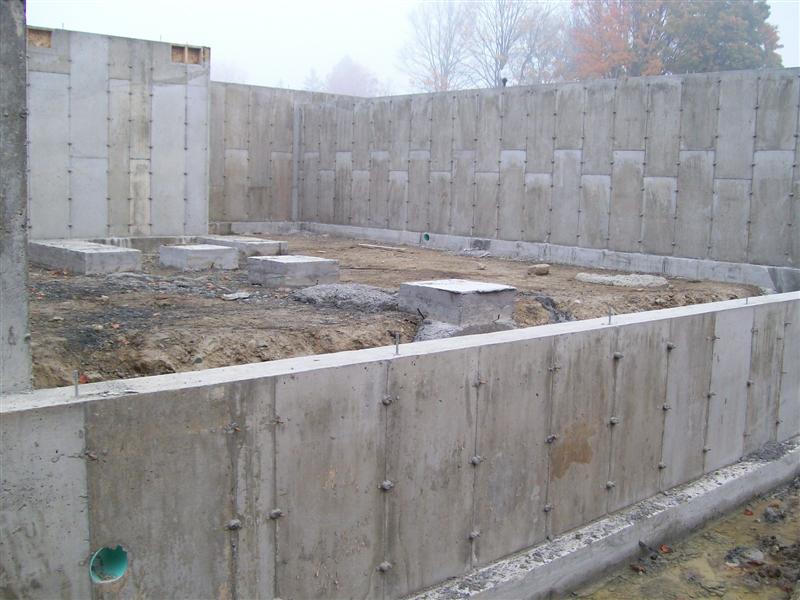
Marcel, you had asked about the term “pinning the hole / foundation”, this is what I meant. You can see the pink surveyor’s tape on the ground marking the location of the corners, then spray paint between them. The first pic is along a side wall which helps the form guys locate the building. The second pic is the back frost wall, this helps the excavator operator locate the wall and allow him to calculate where he needs to dig to give the foundation crew enough room to work, as you’ll see in some of the other pics. After the frost wall is dug, they’ll come out the pin the hole for the foundation guys. When the footing is poured they come out again to pin the footing, you’ll see in the other pics.
support stand for the re-bar to sit on. This keeps it elevated so that the concrete can flow all around the re-bar for maximum strength (sitting on the ground does absolutely no good at all).
Nice Allan, looks like you are keeping busy and nice to see those chairs under the re-bar to have them positioned where they belong for the most structural effectiveness placement for design value.
Keep em coming, we don’t receive to many comments, but that only means absorption of materials and elements. ha. ha.
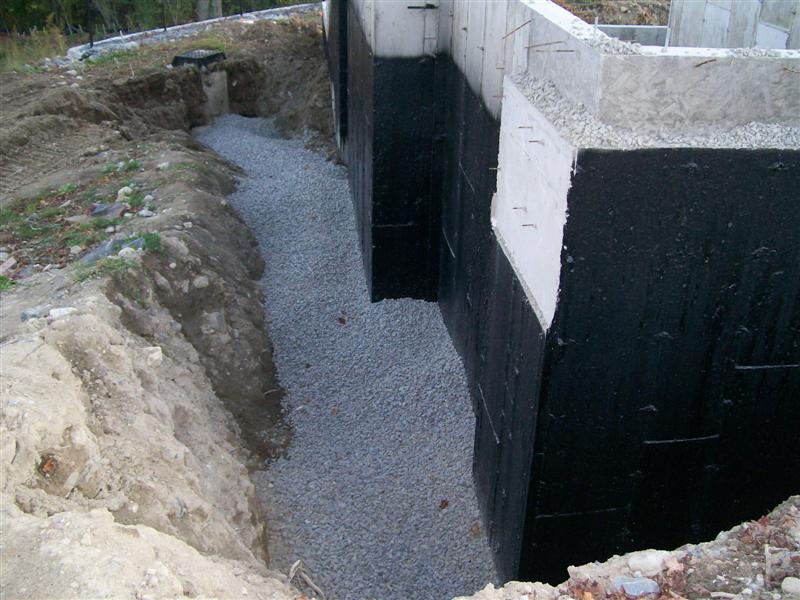
Perimeter drain pipe is in and covered with 3/4" crushed stone. The electrician likes us too, we’ve already installed one of their ground rods for them with the ground wire attached.
Found the curb box for the water service. While we’re here might as well get it connected before completely backfilling the foundation. But I think we need to add a couple extention pieces to get to grade (about another 3-5’ higher).
Under slab drain pipe install in each unit. Even though this building does not have a condo unit in the basement (like the other building), people have the option to have a finished basement (being it is a walk-out basement). An ounce of prevention is worth a pound of cure, it’s a lot cheaper to install the pipe now than try to fix something after it’s all finished.
As of yesterday 10/30/07 building inspector came out and gave us the thumbs up, go ahead and backfill. That’s what we’ll be doing for the next week or so. Backfill the foundation, backfill and compact the inside the garages, stub out the sewer lines and backfill inside the basement areas. After all that is done, we’ll drop some lumber and start framing.
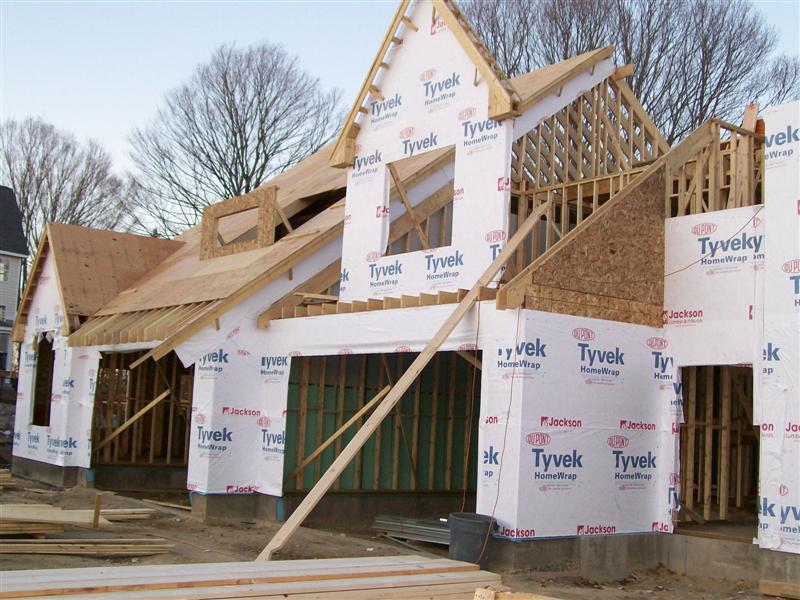
Some progress on this side of the building. We asked the framer to concentrate on the left half of the building where we have sales and one unit to be our model home. Per usual, the big push is on. This half needs to be completed by February (a lot of work to do and not much time, I hope this nice weather keeps up!)
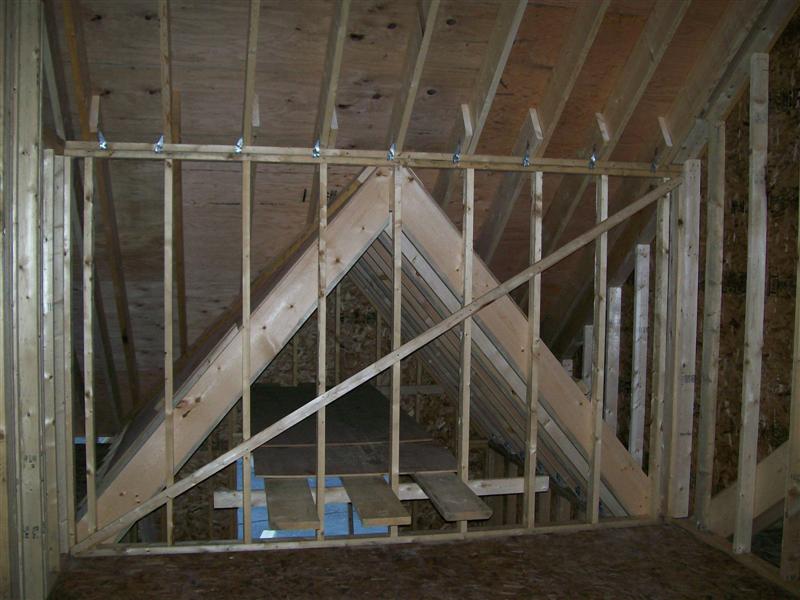
Pics of the back dormer (gable) completed with ceiling joists. When completed this will be the loft area with an open area overlooking the living room. The orange beam is supporting the ceiling as well as the roof load above. The rafters were cut and notched onto the beam above then secured with hurricane tie downs. The rafters were split due to the length of run, they would had to have been over 30’ long, this way it’s easier to handle, cost effective and just as strong.
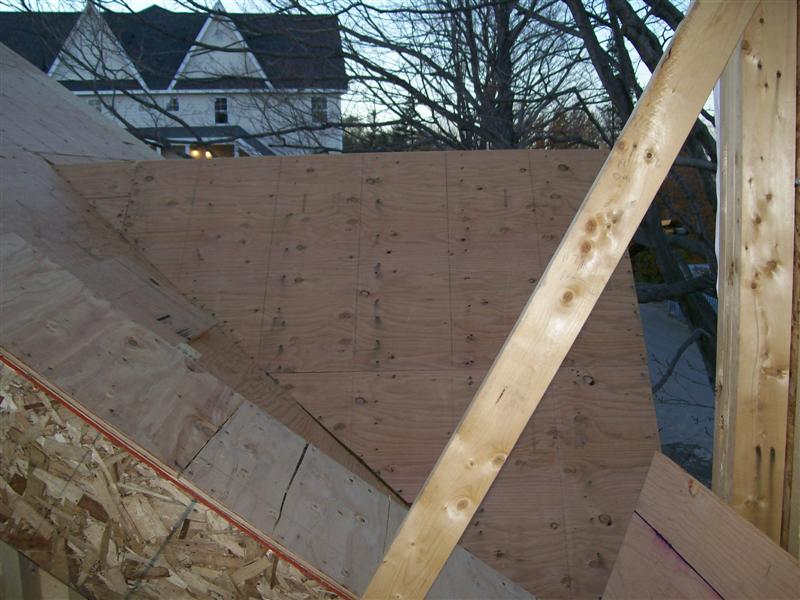
Front gable for the cathedral ceiling for the eat-in dinning area as viewed from the loft area. The wall in the foreground will be sheetrocked, therefore it will be necessary to install “proper vent” (styrofoam channel vents) from the top plates of this wall, along the rafters to just beyond the ceiling joists to ensure adequate venting in the attic space above.