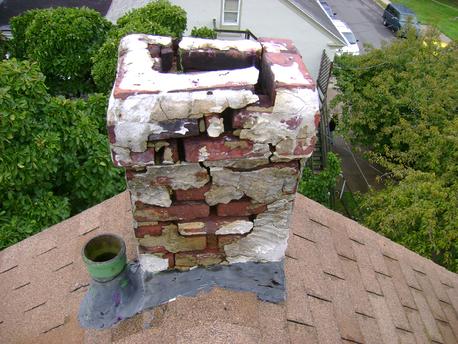
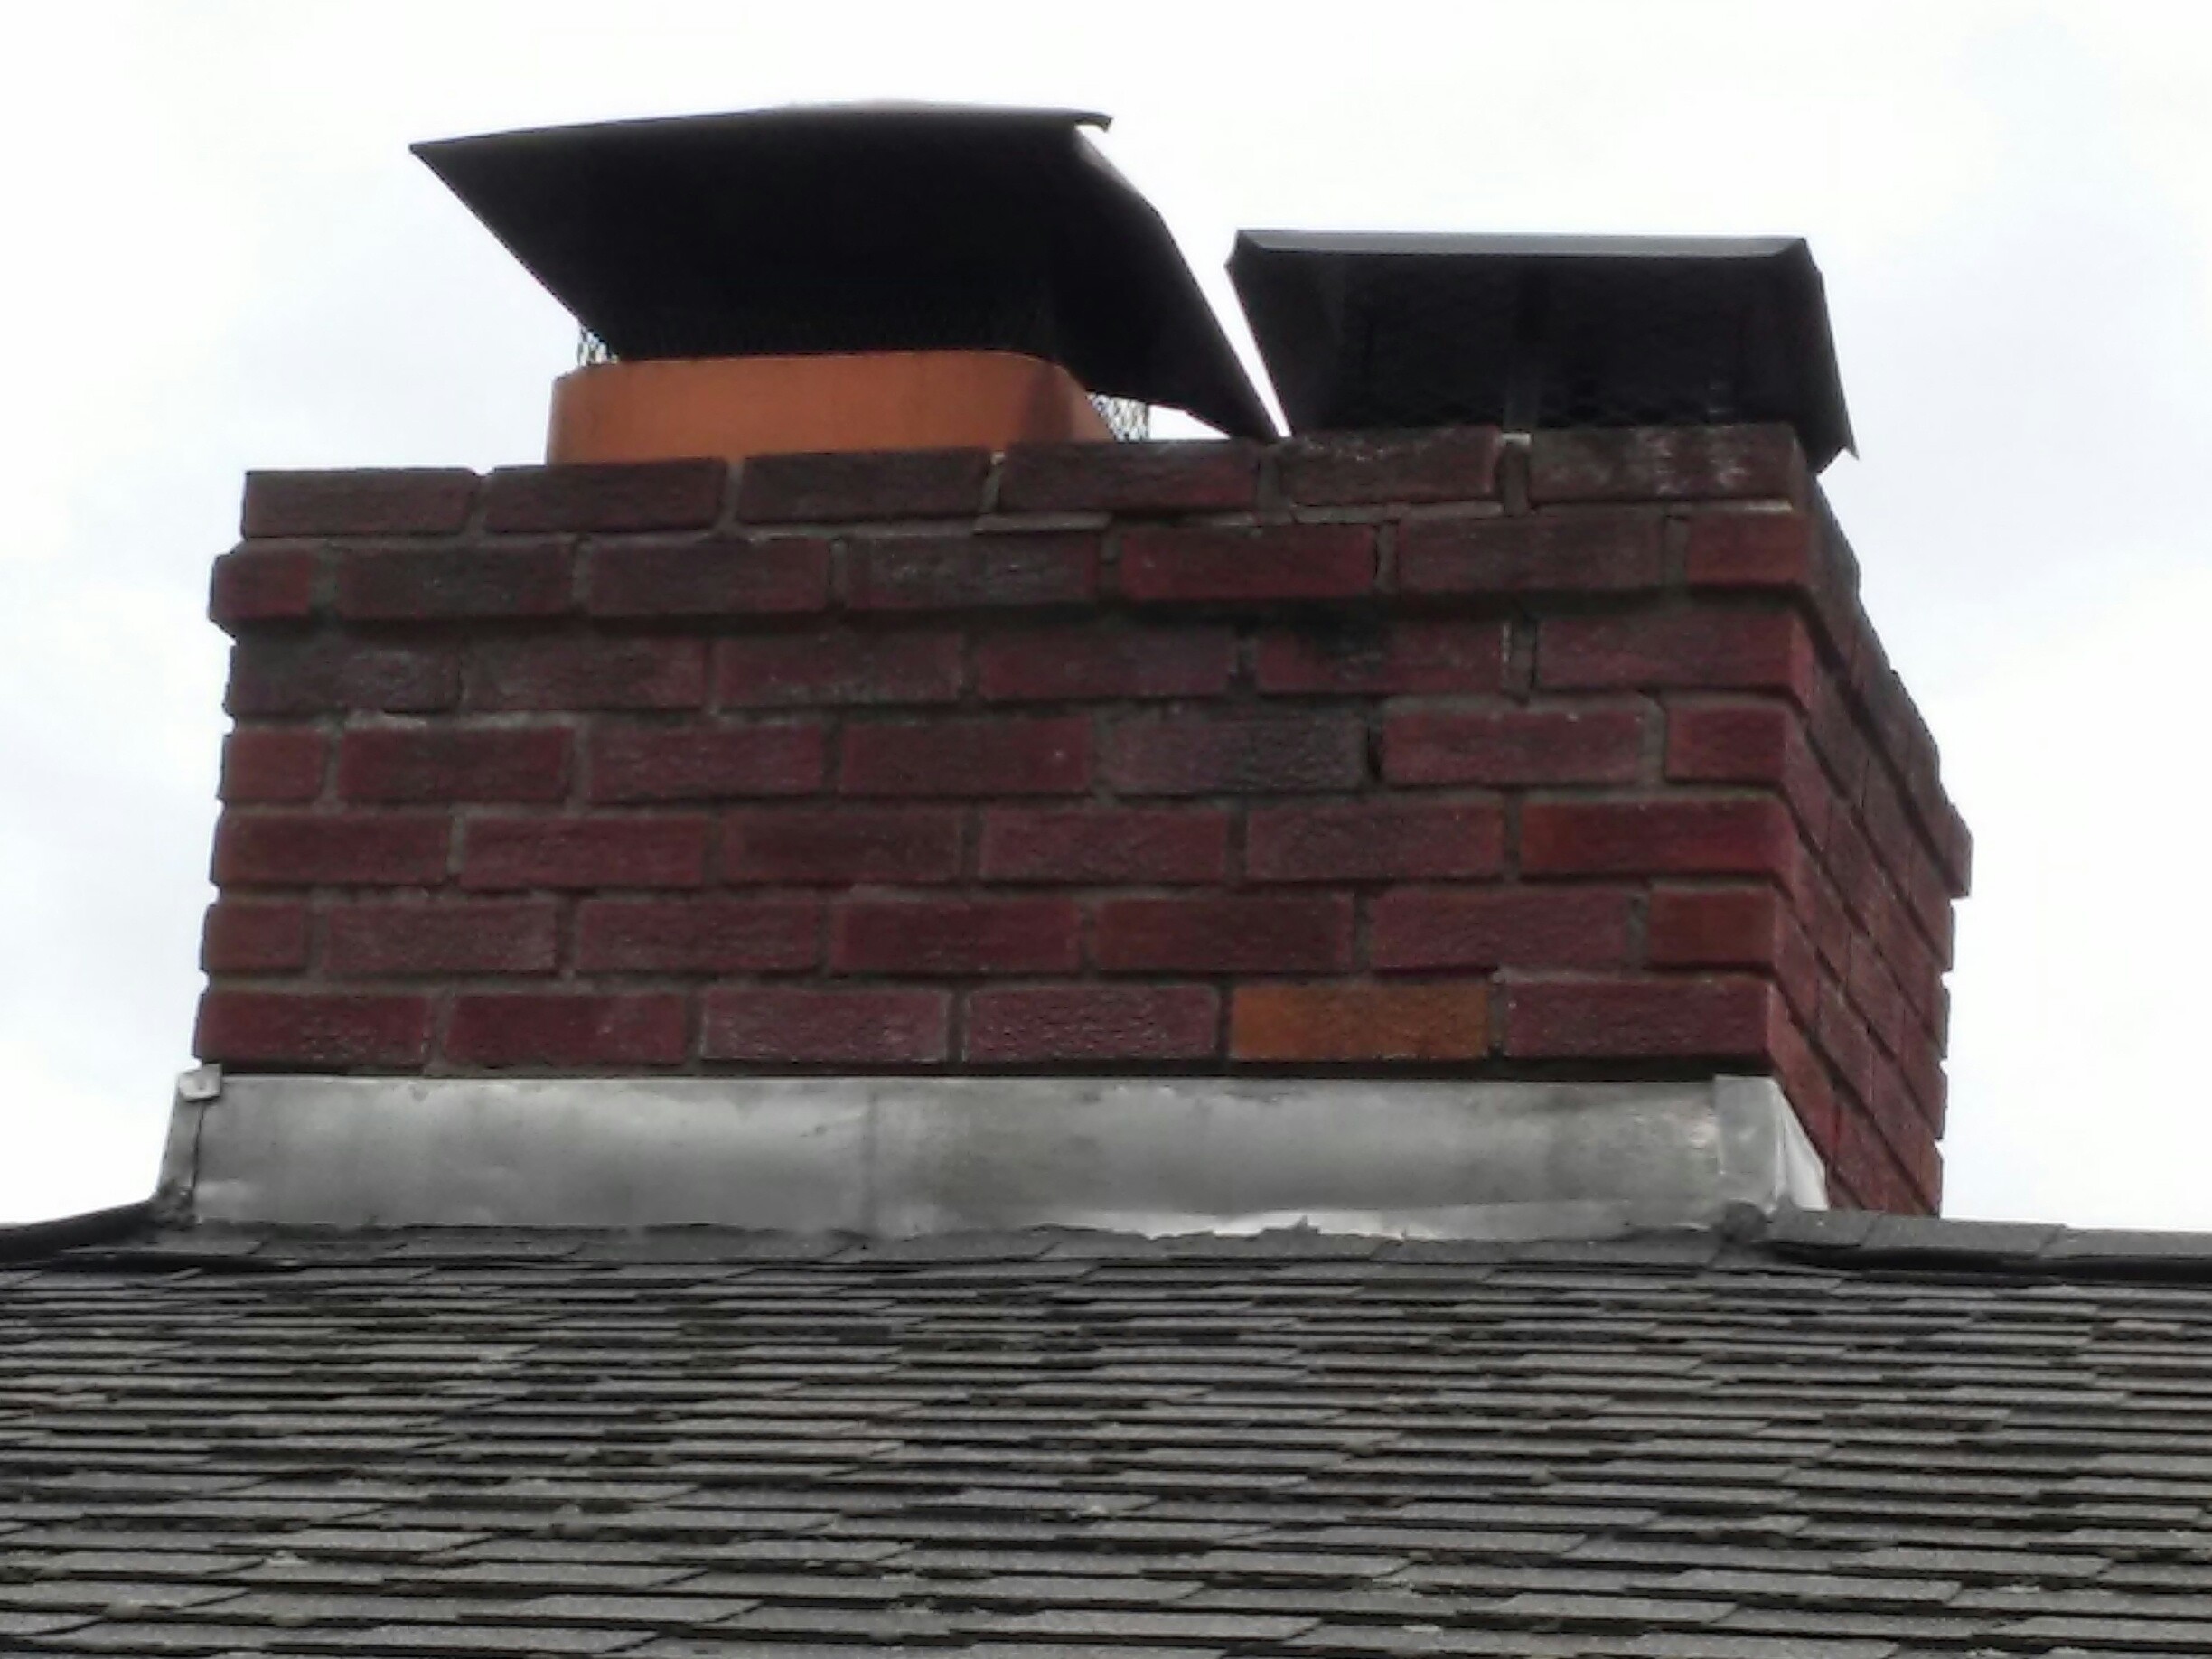
Attached is an image of a chimney that will not pass inspection. Chimney is 3 feet high and located on the ridge. Noted is excessive spalling and recommend re-pointing or complete replacement before inhabiting. Rain cap is missing and flashing needs further inspection. Recommend professional review.
The article I read was written by Nick Gromicko and entitled “Ant Inspection”. The article was very informative about the dangers of ant infestations and also on how to identify the problems and the species of ant that may be causing the issues. Interesting facts were presented on how to delineate between winged ants and termites. The author points out that with infestation of ants comes other problems that may cause a home to not pass inspection; rotted wood for structural reason and etc. It was a very informative read.
Upon initial inspection of the roof system from ground level. I was able to observe that there was not drip edge in place around the entire house. I did observe the shingles to hang over the fascia approximately one inch but this is not sufficient enough to keep water from entering where the fascia and roof decking meet.My reccomendation would be to have a liscensed roofer come and and install adequate drip edge around the entire house and conduct a more through inspection to make sure no damage has occured to the roof decking and fascia.
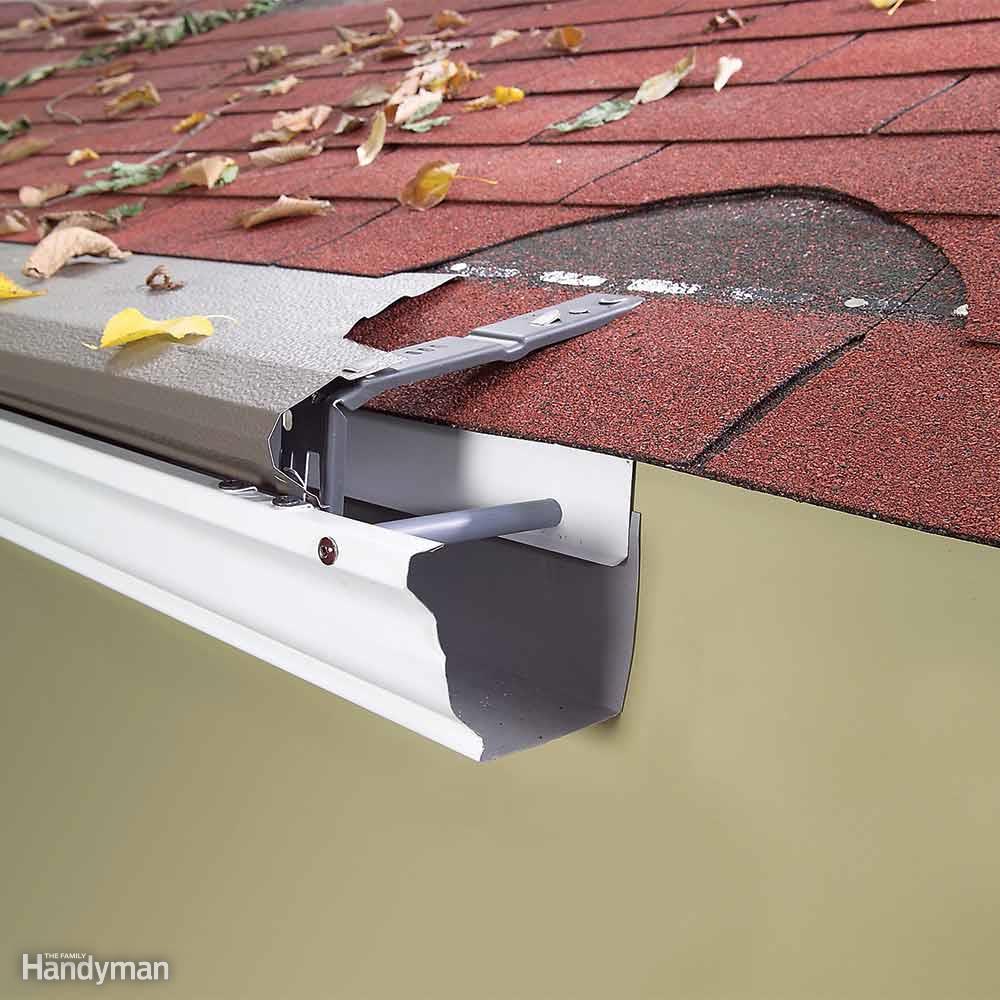
In the attached photo there are a lot of things wrong I will try to capture all of them. First the gutter does not continue the entire distance of the eave it is mounted too. The flashing is improperly installed; which should be replaced along with the roof covering shingle that is missing some material. Most of the shingles show signs of age and missing material on the edges. Back to the gutter it doesn’t have either an end cap or downspout and there are exposed mounting nails that could cause water intrusion. Also the leave barrier to keep the gutters clean is in fact overlapping the gutter allowing the water to run over and continue into the eves underneath.
I read the article on inspecting aluminum wiring. I was aware of the conduction differences of aluminum versus copper, but was unaware of the fact that aluminum doesn’t absorb shock as well as copper. I have seen in some cases of aluminum wiring loose at outlets. Sure it could be the installation never was tight from the beginning or was it because of either shock, wiring breaking down. I will definitely pay closer attention to this in future inspections… Good article!
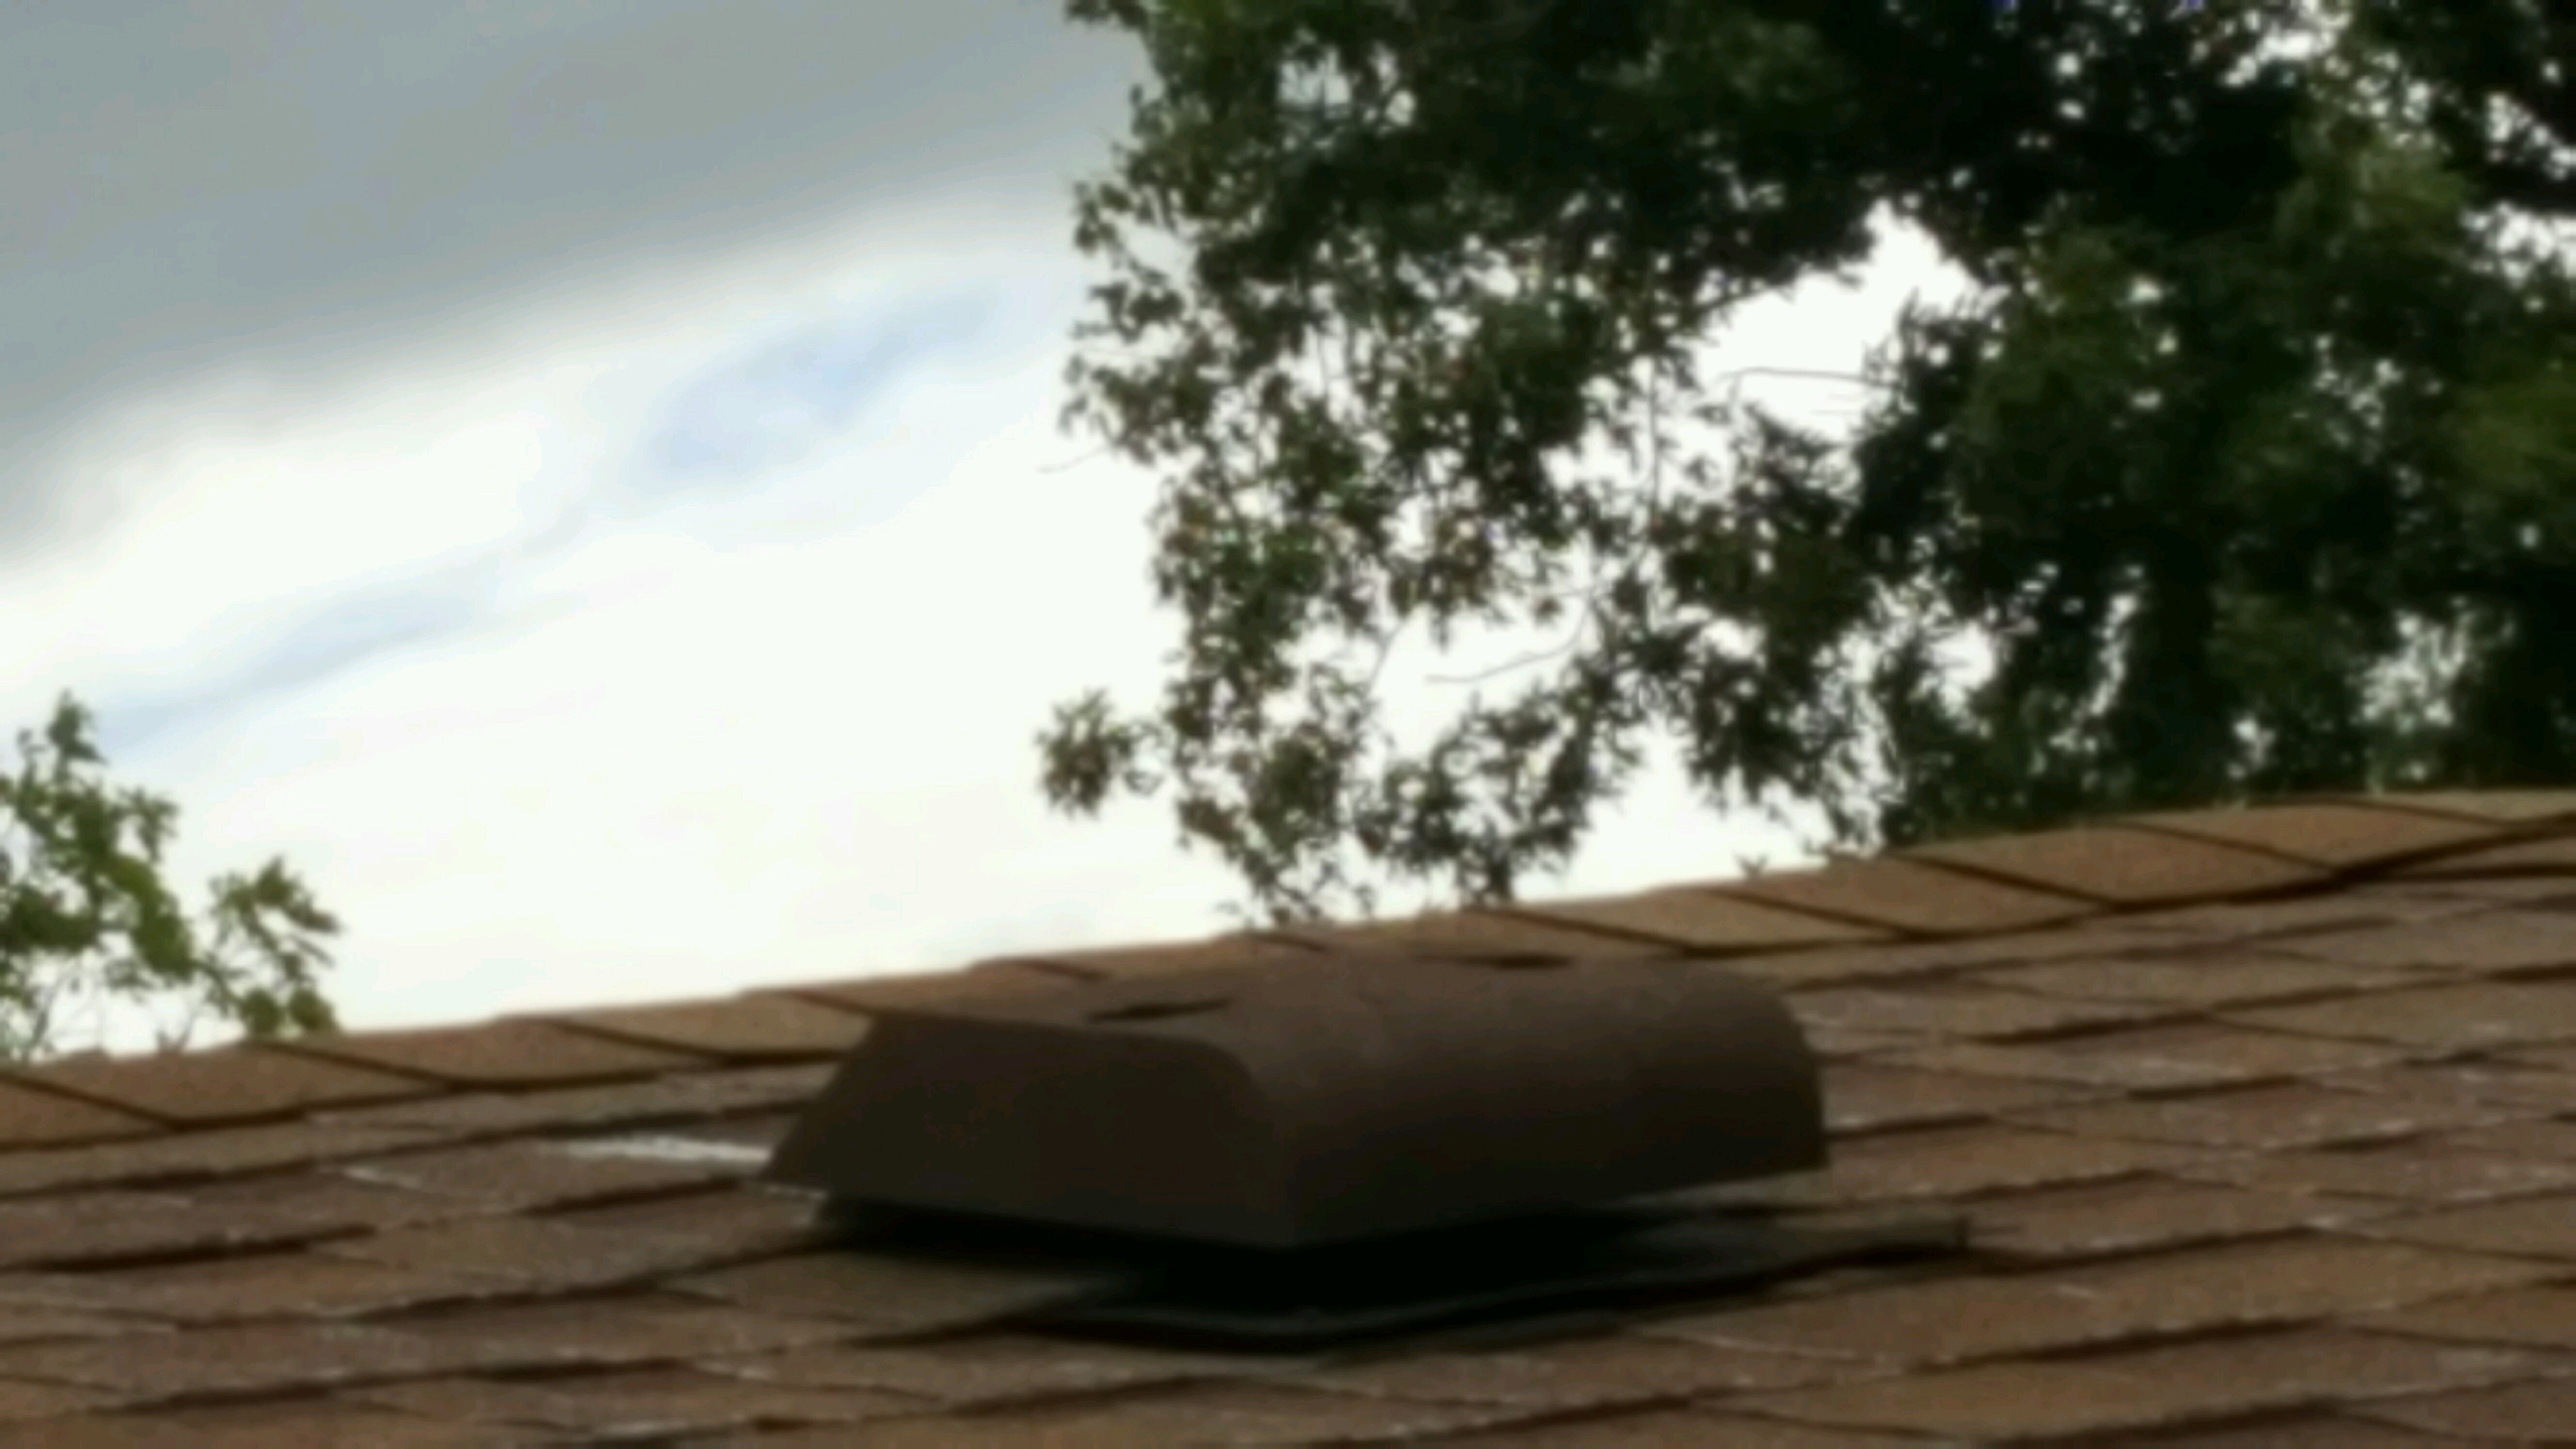
Ridge Vent: The ridge vent in the picture has passed its life expectancy or has improper installation causing a roof leaks throughout the structure. A temporary tarp was place on the structure prior to inspection. Inspection results suggested a new roof was to be installed.
Aluminum Siding: Aluminum Siding has been in general use since the 1940s. Although it is not a popular product today, it still possesses good qualities like non-rusting and being lightweight. There are some negative traits, like easily dented and a conductor of electricity.
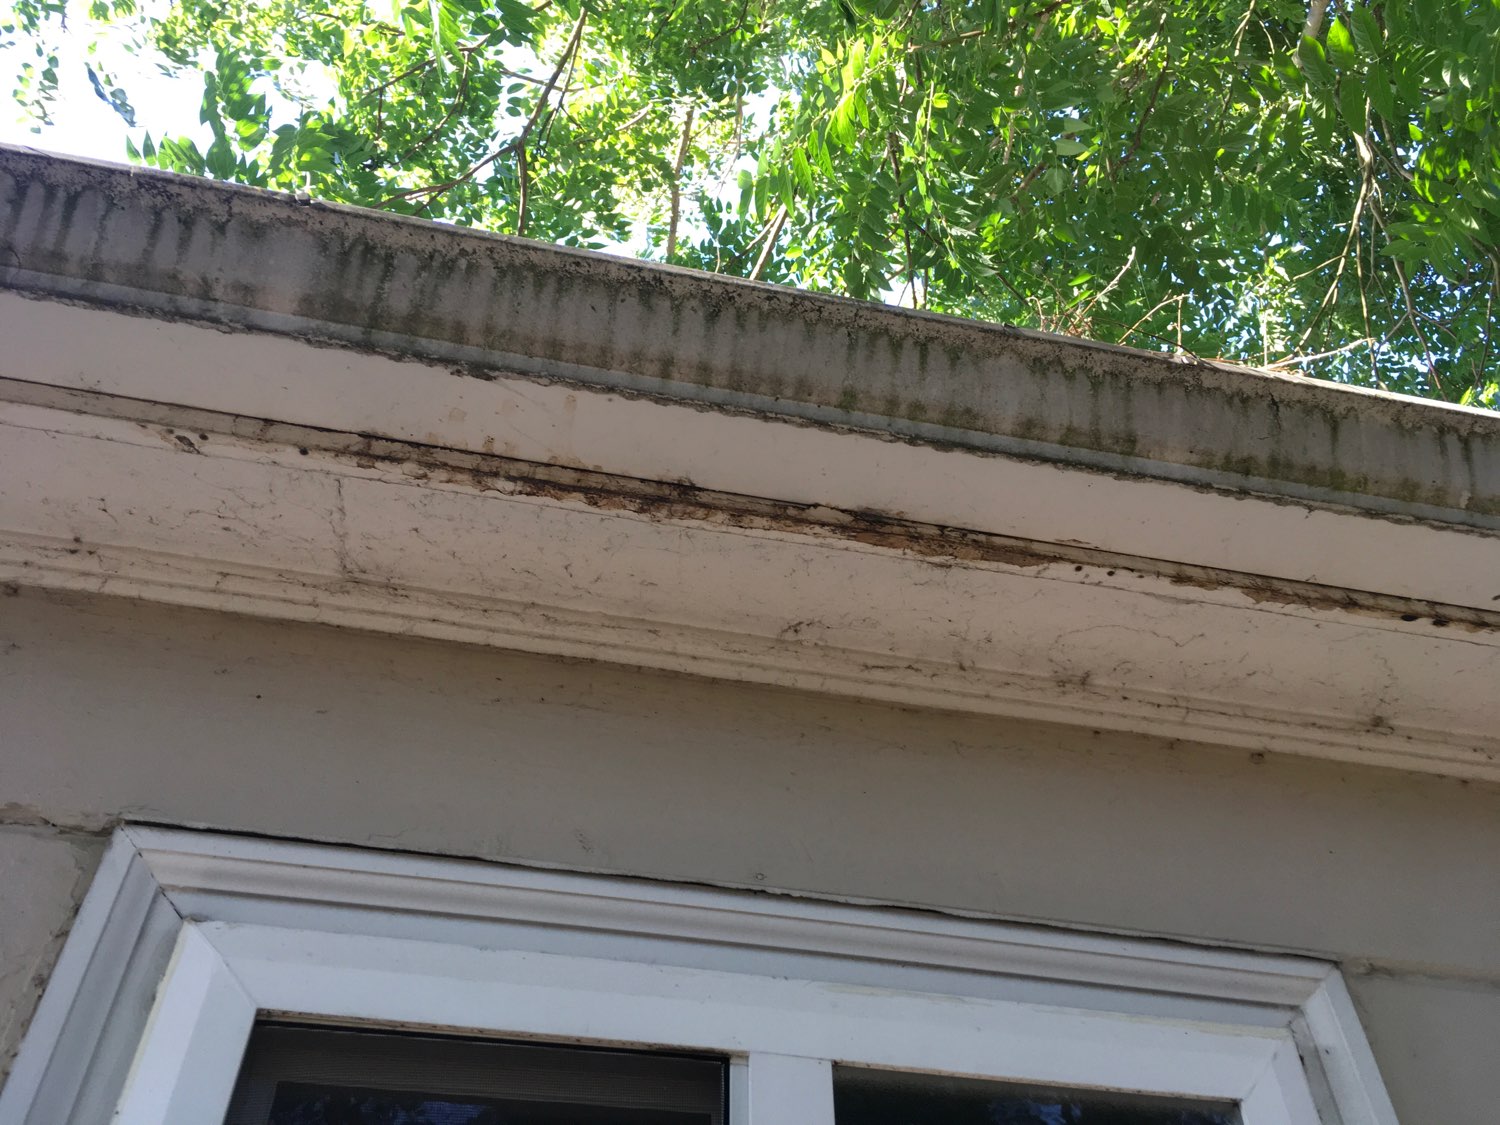
The gutters are all stuffed with debris front and back of home. Evidence of water spill over is visible on all the gutters as staining. Water stains show evidence of flowing under eves and behind siding. Recommend cleaning gutters annually or as needed.
In regards to the image of downspouts. Check all down spouts and call out any that are two short. Downspouts should discharge water at least 5 feet from the foundation keeping water from collecting near the foundation and seeping back into the foundation or crawlspace.
From the eaves I can clearly see sizable holes in the top of the pod vents due to their older looking condition the previous hail storm a while ago might have been the cause of that. I would suggest having them replaced to avoid future water damage.
Electrical panels can be the carriers of multiple “potential fire hazard and safety problems.” When inspecting electrical housing using the good practices as a guide is going to be much more effective compared to whats acceptable. Good practices of installment will set the bar and help you discover defects that need to be pointed out.
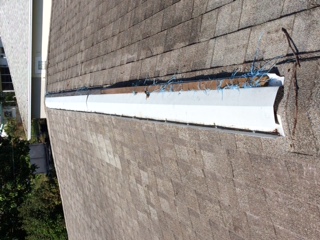
This gutter and downspout would fail a home inspection. This is because, as you can see in the picture, the gutter has begun to sag on the right side exposing the fascia. This has pitched the gutter to the side with no downspout and is putting water directly next to the house’s foundation. The downspout on the left is not draining away from the house; the bottom of the downspout isn’t even pointed away from the house. I would recommend that the gutter be replaced entirely and the fascia board behing be inspected by a licensed contractor for water damage.
I read the article on attic access ladders. What I’ve learned from the article is that homeowners generally install these themselves and usually do not do it properly. The main issues are: cutting trusses, improper insulation, and improper hardware. I now know to look for these things when I encounter one on a home inspection.
The roof shingles were inspected and found to be in good condition. They are a fiberglass demential shingle. The flashing around the chimney was also inspected and found to be properly installed into the mortar on the chimney. Some repointing of the chimney mortar flashing joint is recommended.
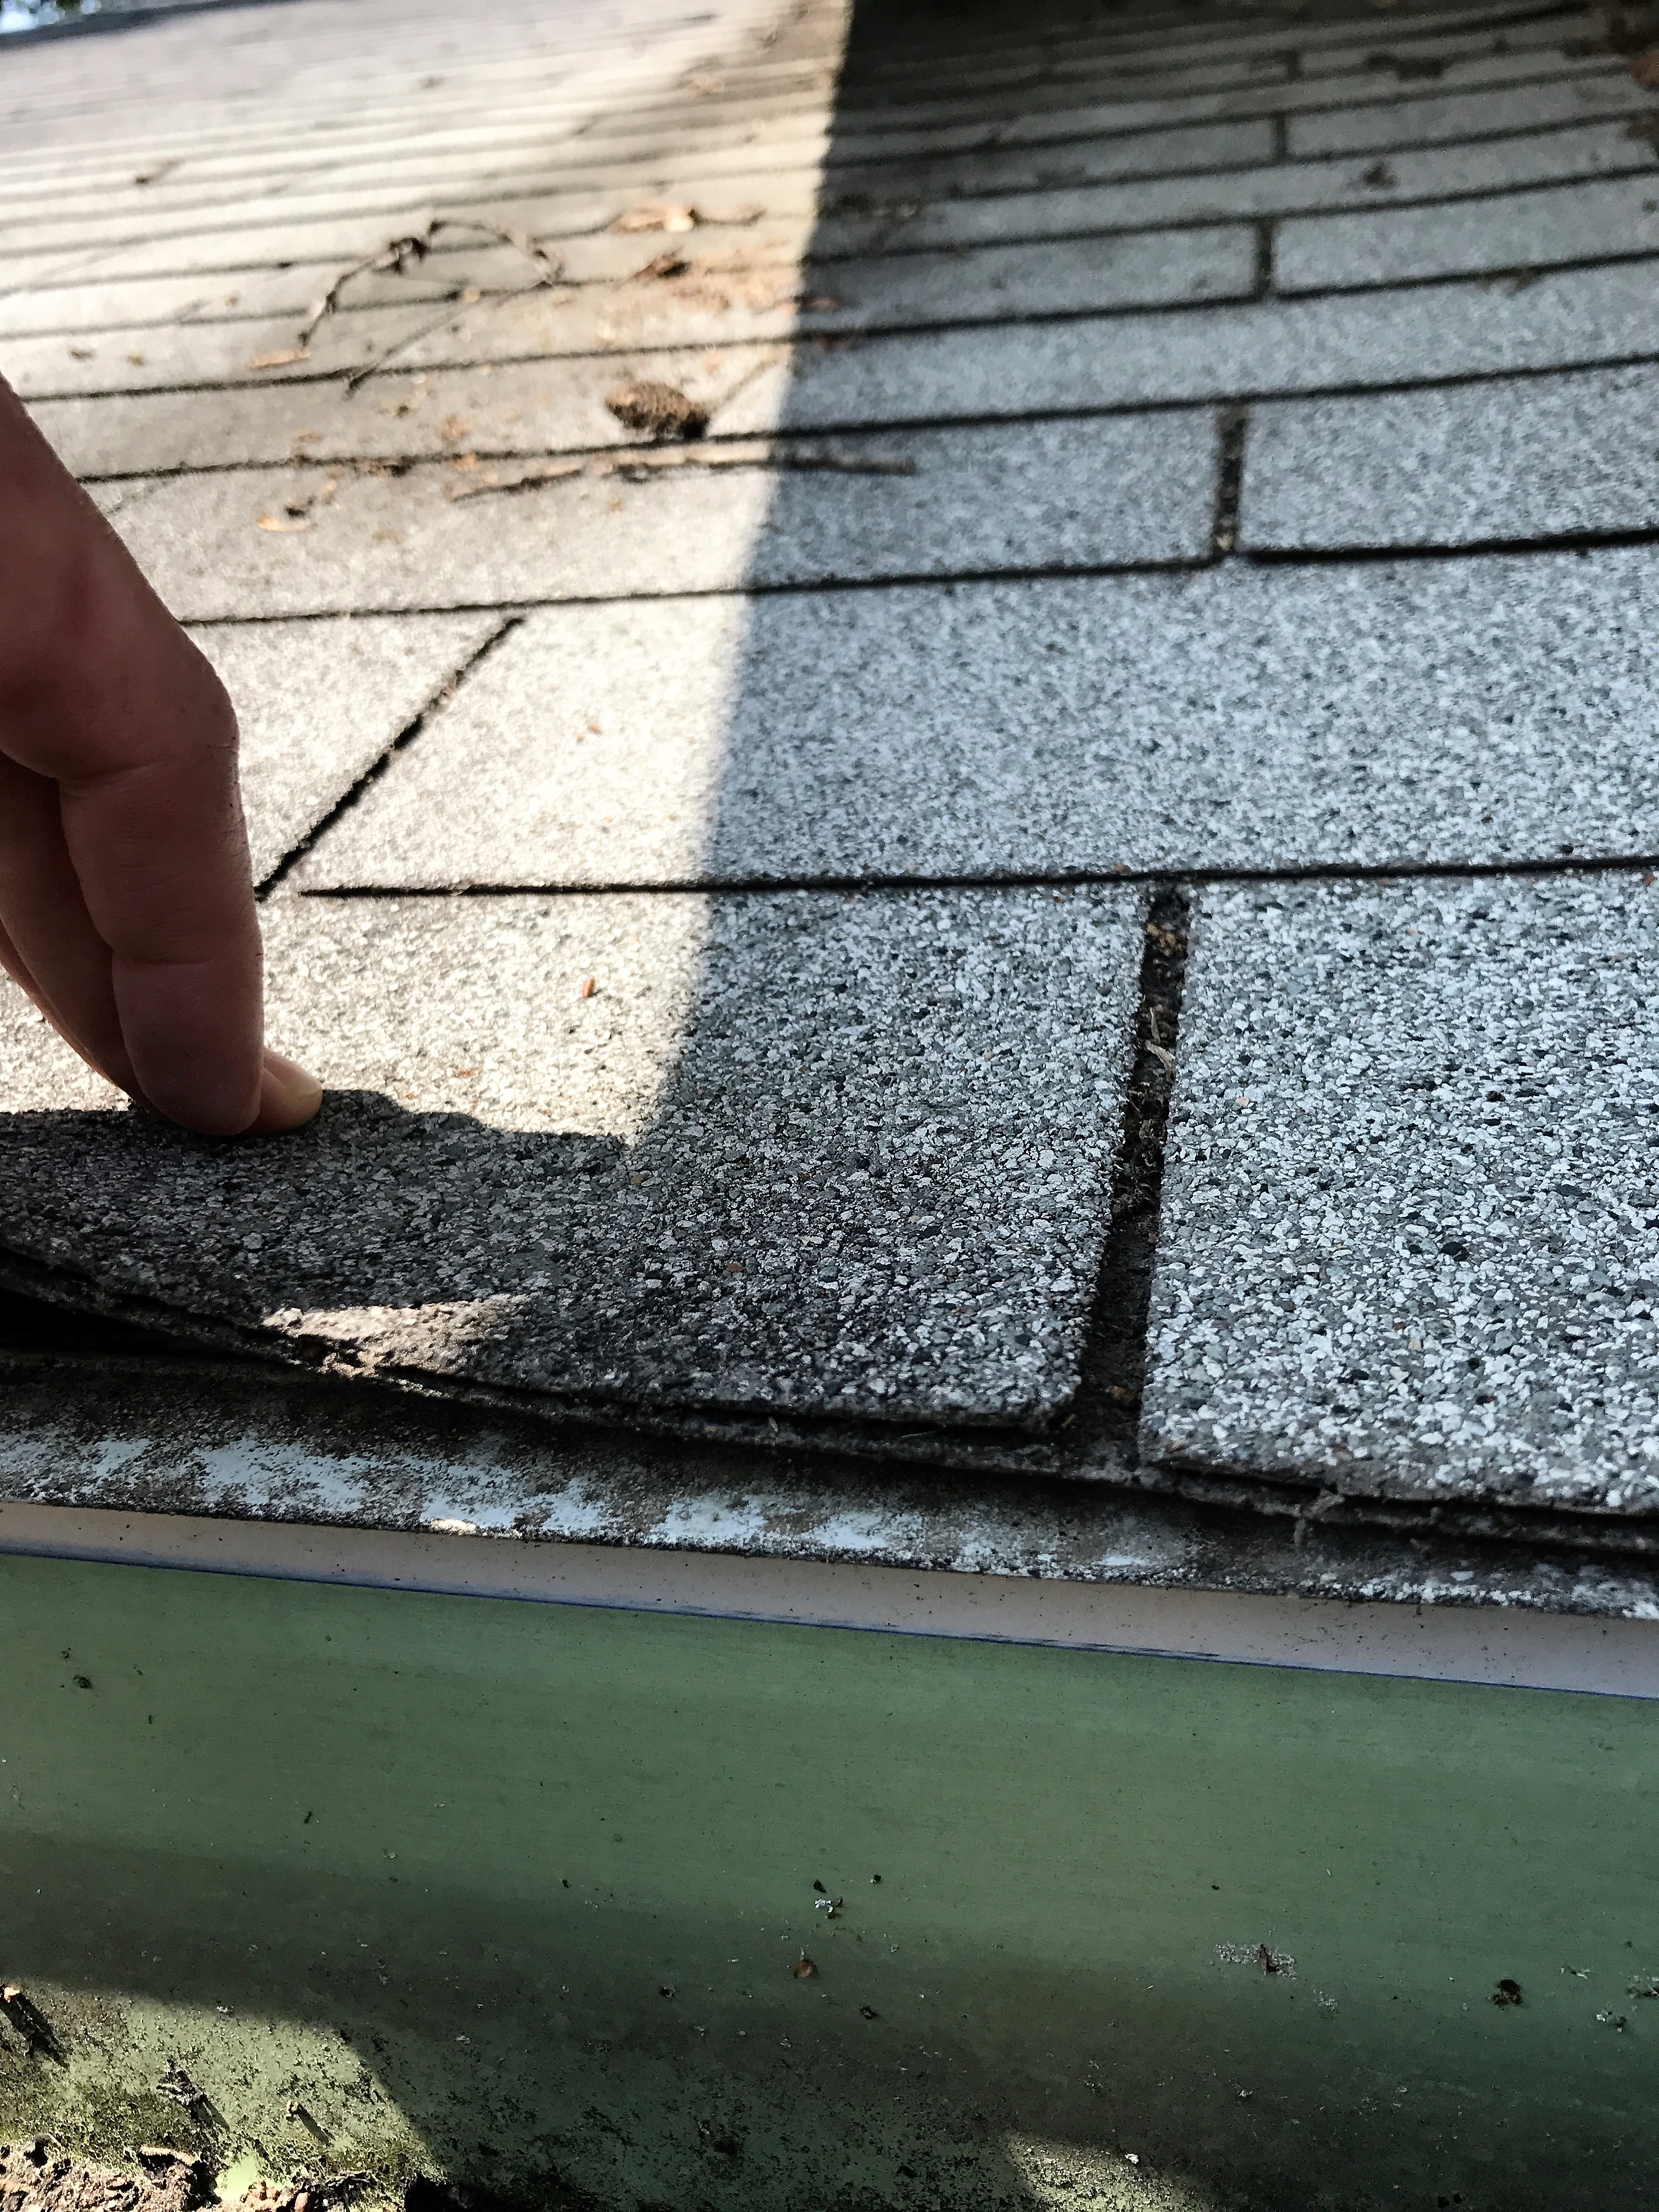
The roof covering is one layer of three tab asphalt shingles with one layer of underlayment. Good. The drip edge at the eaves is installed under the underlayment. Good. The drip edge is protruding a 1/4 of an inch past the shingles and is installed under the back face of the gutters. This is causing water to seep between the gutter and fascia.
My essay is on the article “10 Rental Tools for DIY Home Projects”. When it comes to saving money DIY projects are the way to go. Saving money and having fun doing it is a win win! When taking on a home project such as maybe a fence you could save money and your back by renting a hole auger instead of buying one. There are tons of tools to rent that could save you time and money by doing it yourself.
There are basically three different types of underlayment. Asphalt saturated felt, rubberized asphalt, and non-bitumen synthetic. It is good to know the differences as they can have different applications, fasteners, and installment procedures. For example, if an installer uses non-Bitumen synthetic the same way he would felt, it can cause moisture problems.
In this picture, you can see a roof/chimney system in very poor shape. Starting from the top, the chimney cap, and masonry surround is cracked and damaged and needs to be repaired. Due to this, the step flashing is not bonded to the chimney (through counter flashing or any other method) and is a major moisture intrusion point. The shingles around the flashing are poorly installed as well.
I read the article pertaining to roofing underlayment types. I found this article very informative, because very little information can be taken about the underlayment during the inspection. Due to this, I feel it is very important to have a good understanding of how the system work, so any clues of defects can be found.
Common roof framing are rafters set 24" apart with each rafter support lined up with rafter on opposite side. Collar ties used to keep the rafters from spreading are placed no more than 1/3 down from the peak. They are also spread every other rafter. Down at the bottom are ceiling joist which can be used as rafter supports.