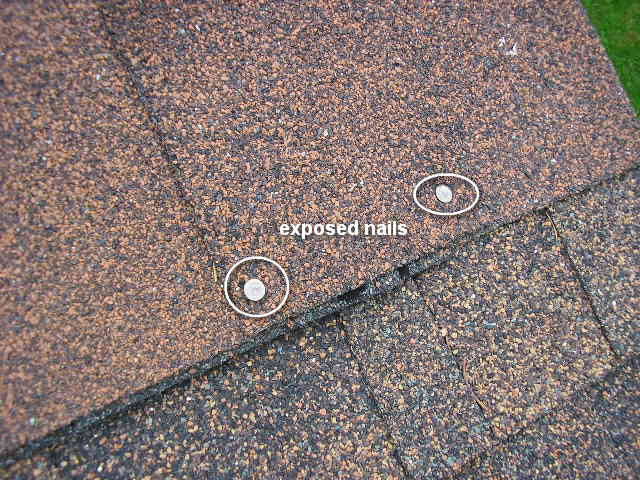
While inspecting the asphalt shingle roof, two exposed nail heads were noticed and photographed. I would mark these as a major due to the potential moisture intrusion risk they pose. I recommend contacting a roofer to evaluate the situation and rectify the problem.
I read the article about the different types of roofing underlayment. There are three basic types of underlayment used beneath roofing materials: asphalt-saturated felt; rubberized asphalt; and non-bitumen synthetic. The most common of these is the asphalt-saturated felt. While it is water resistant it is not water proof, and comes in two layers of thickness.
I researched the Ice Dams article. I was very happy to read a lot about attic insulation and air sealing ceilings instead of the “shade tree” contractors that insist on adding even more attic ventilation. We do not have a lot of issues with guttering coming loose from the home in my area because we rarely have excessive accumulation.
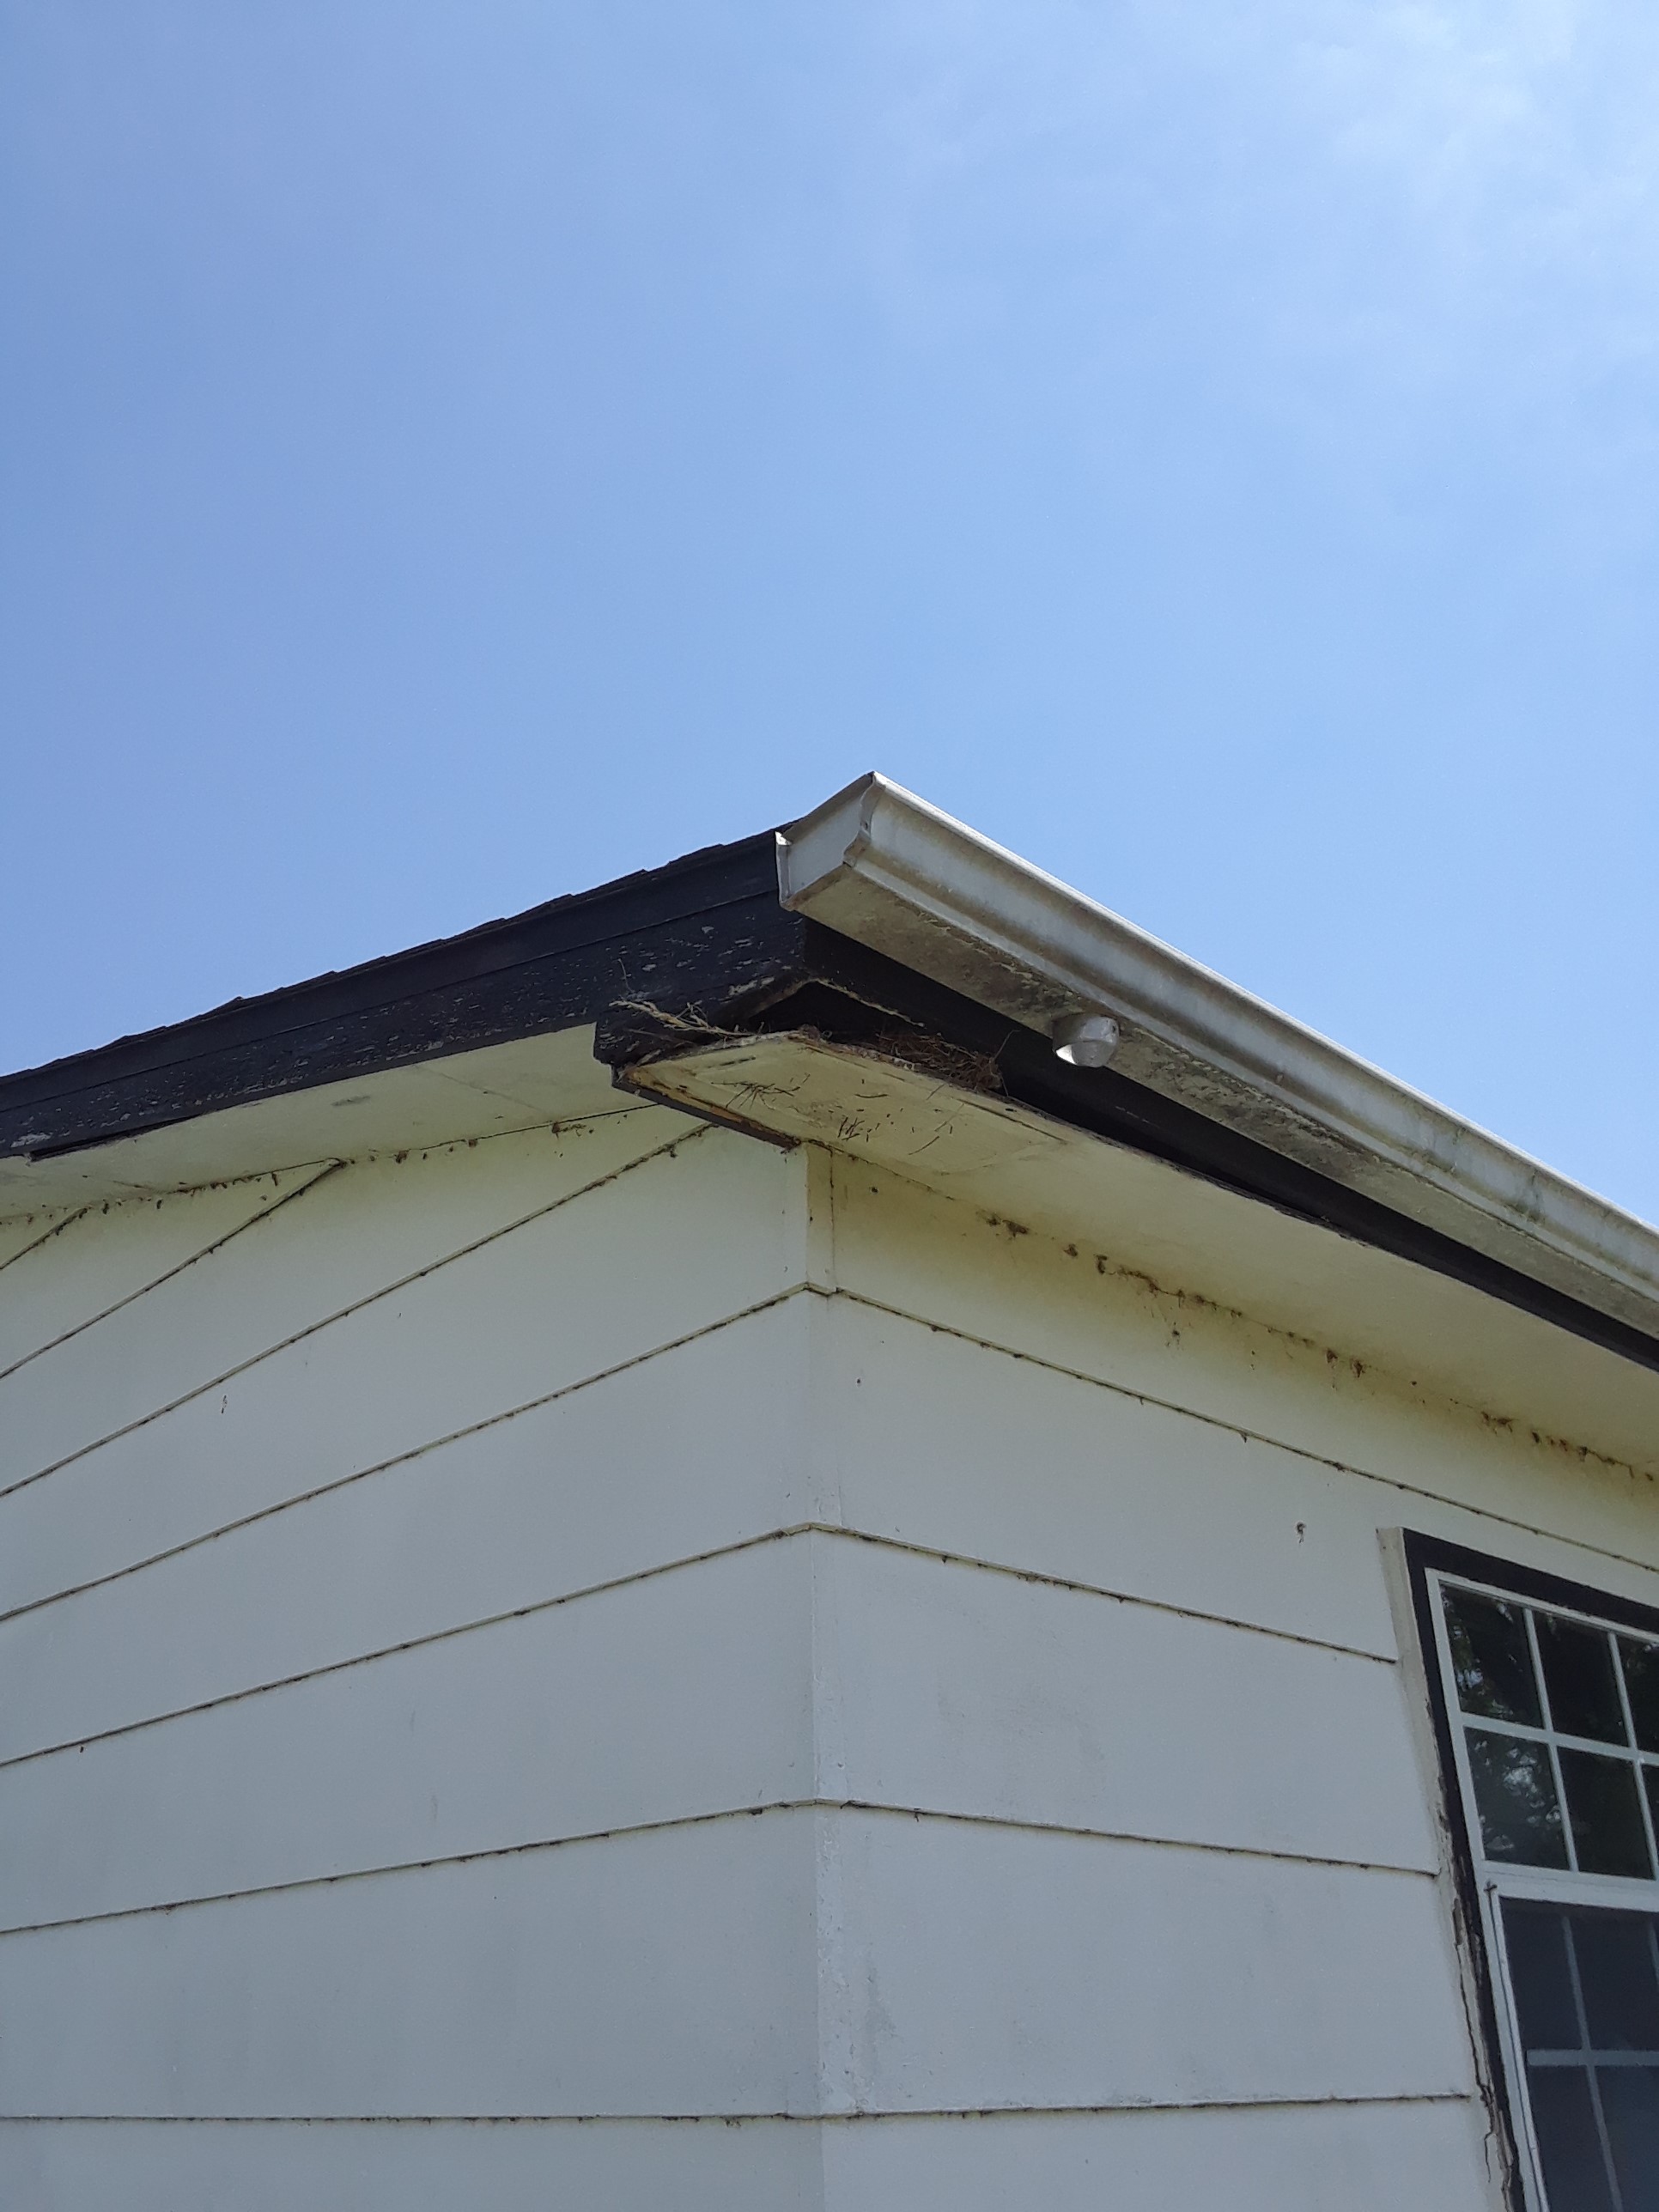
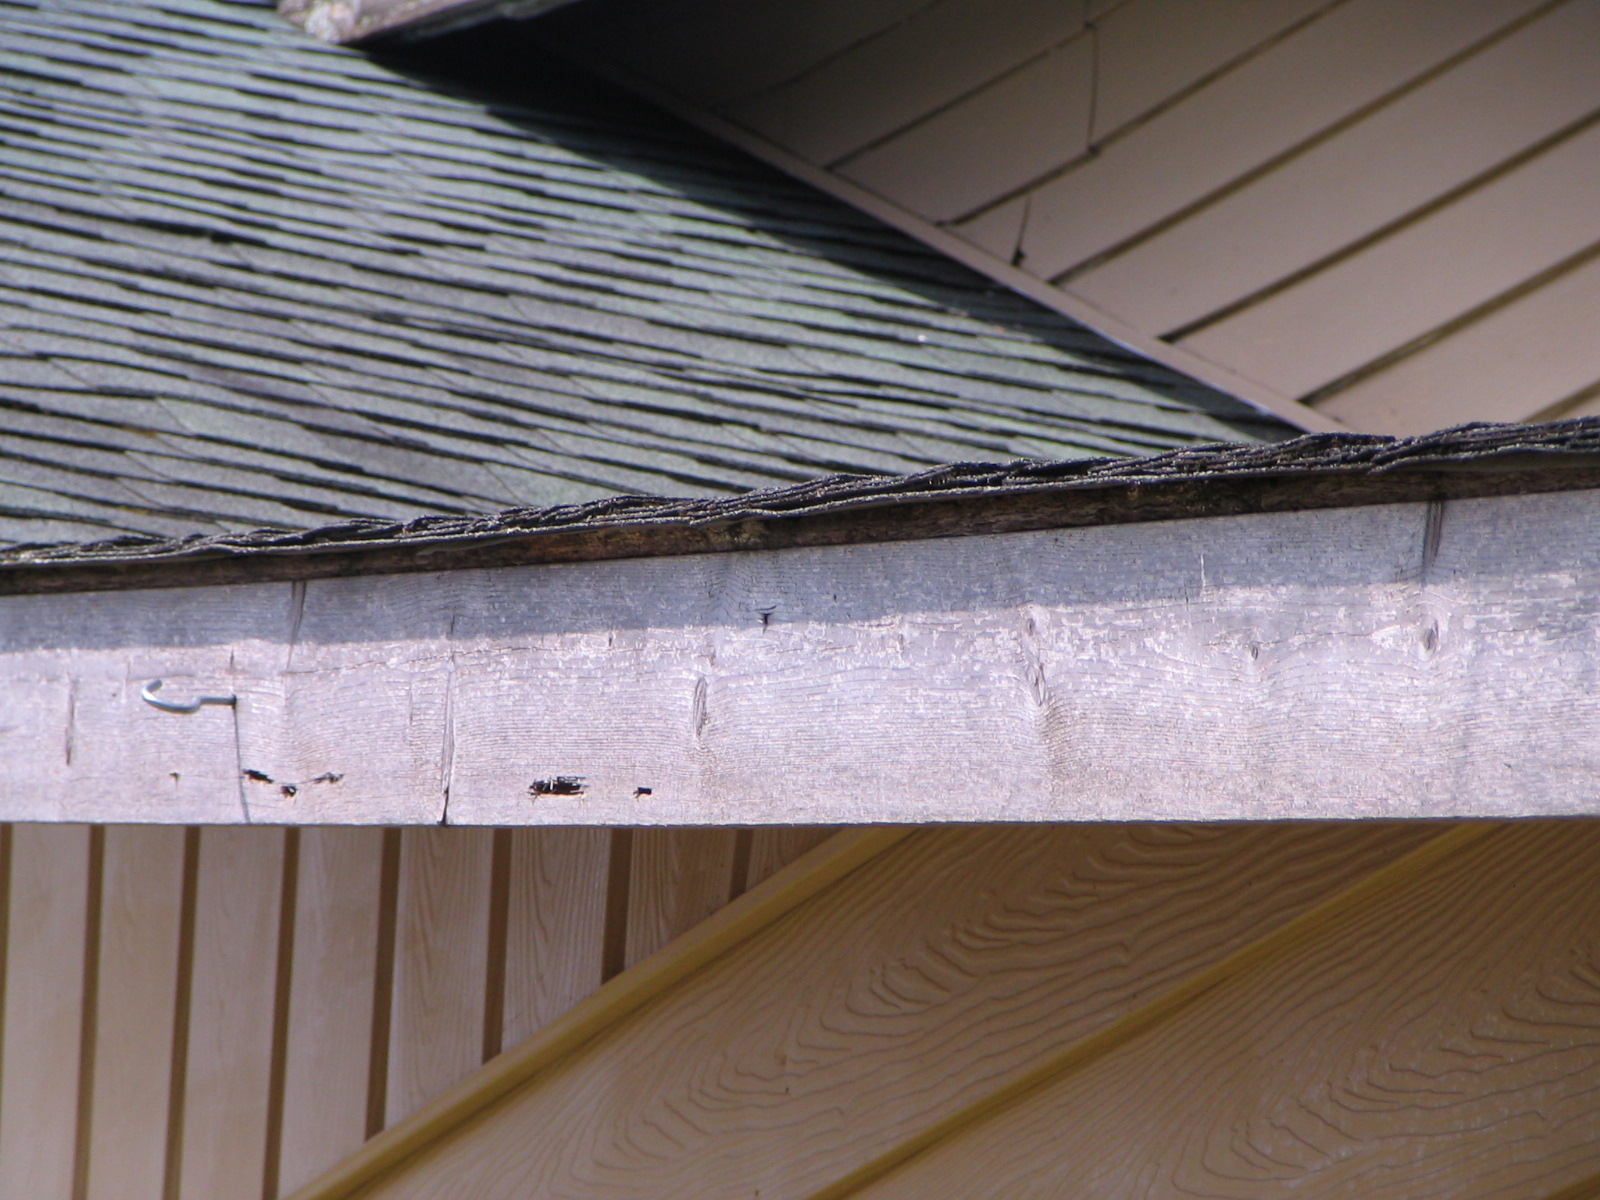
Guttering with no downspout has destroyed this fascia and soffit. Also no rake drip edge. We replaced this roof, fascia, soffit, and corrected the moisture issues. Everyone I know that performs inspections groans when they see a bad roof, knowing what issues they can find.
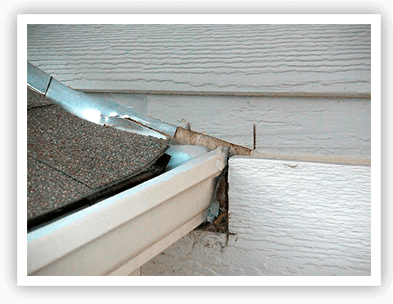
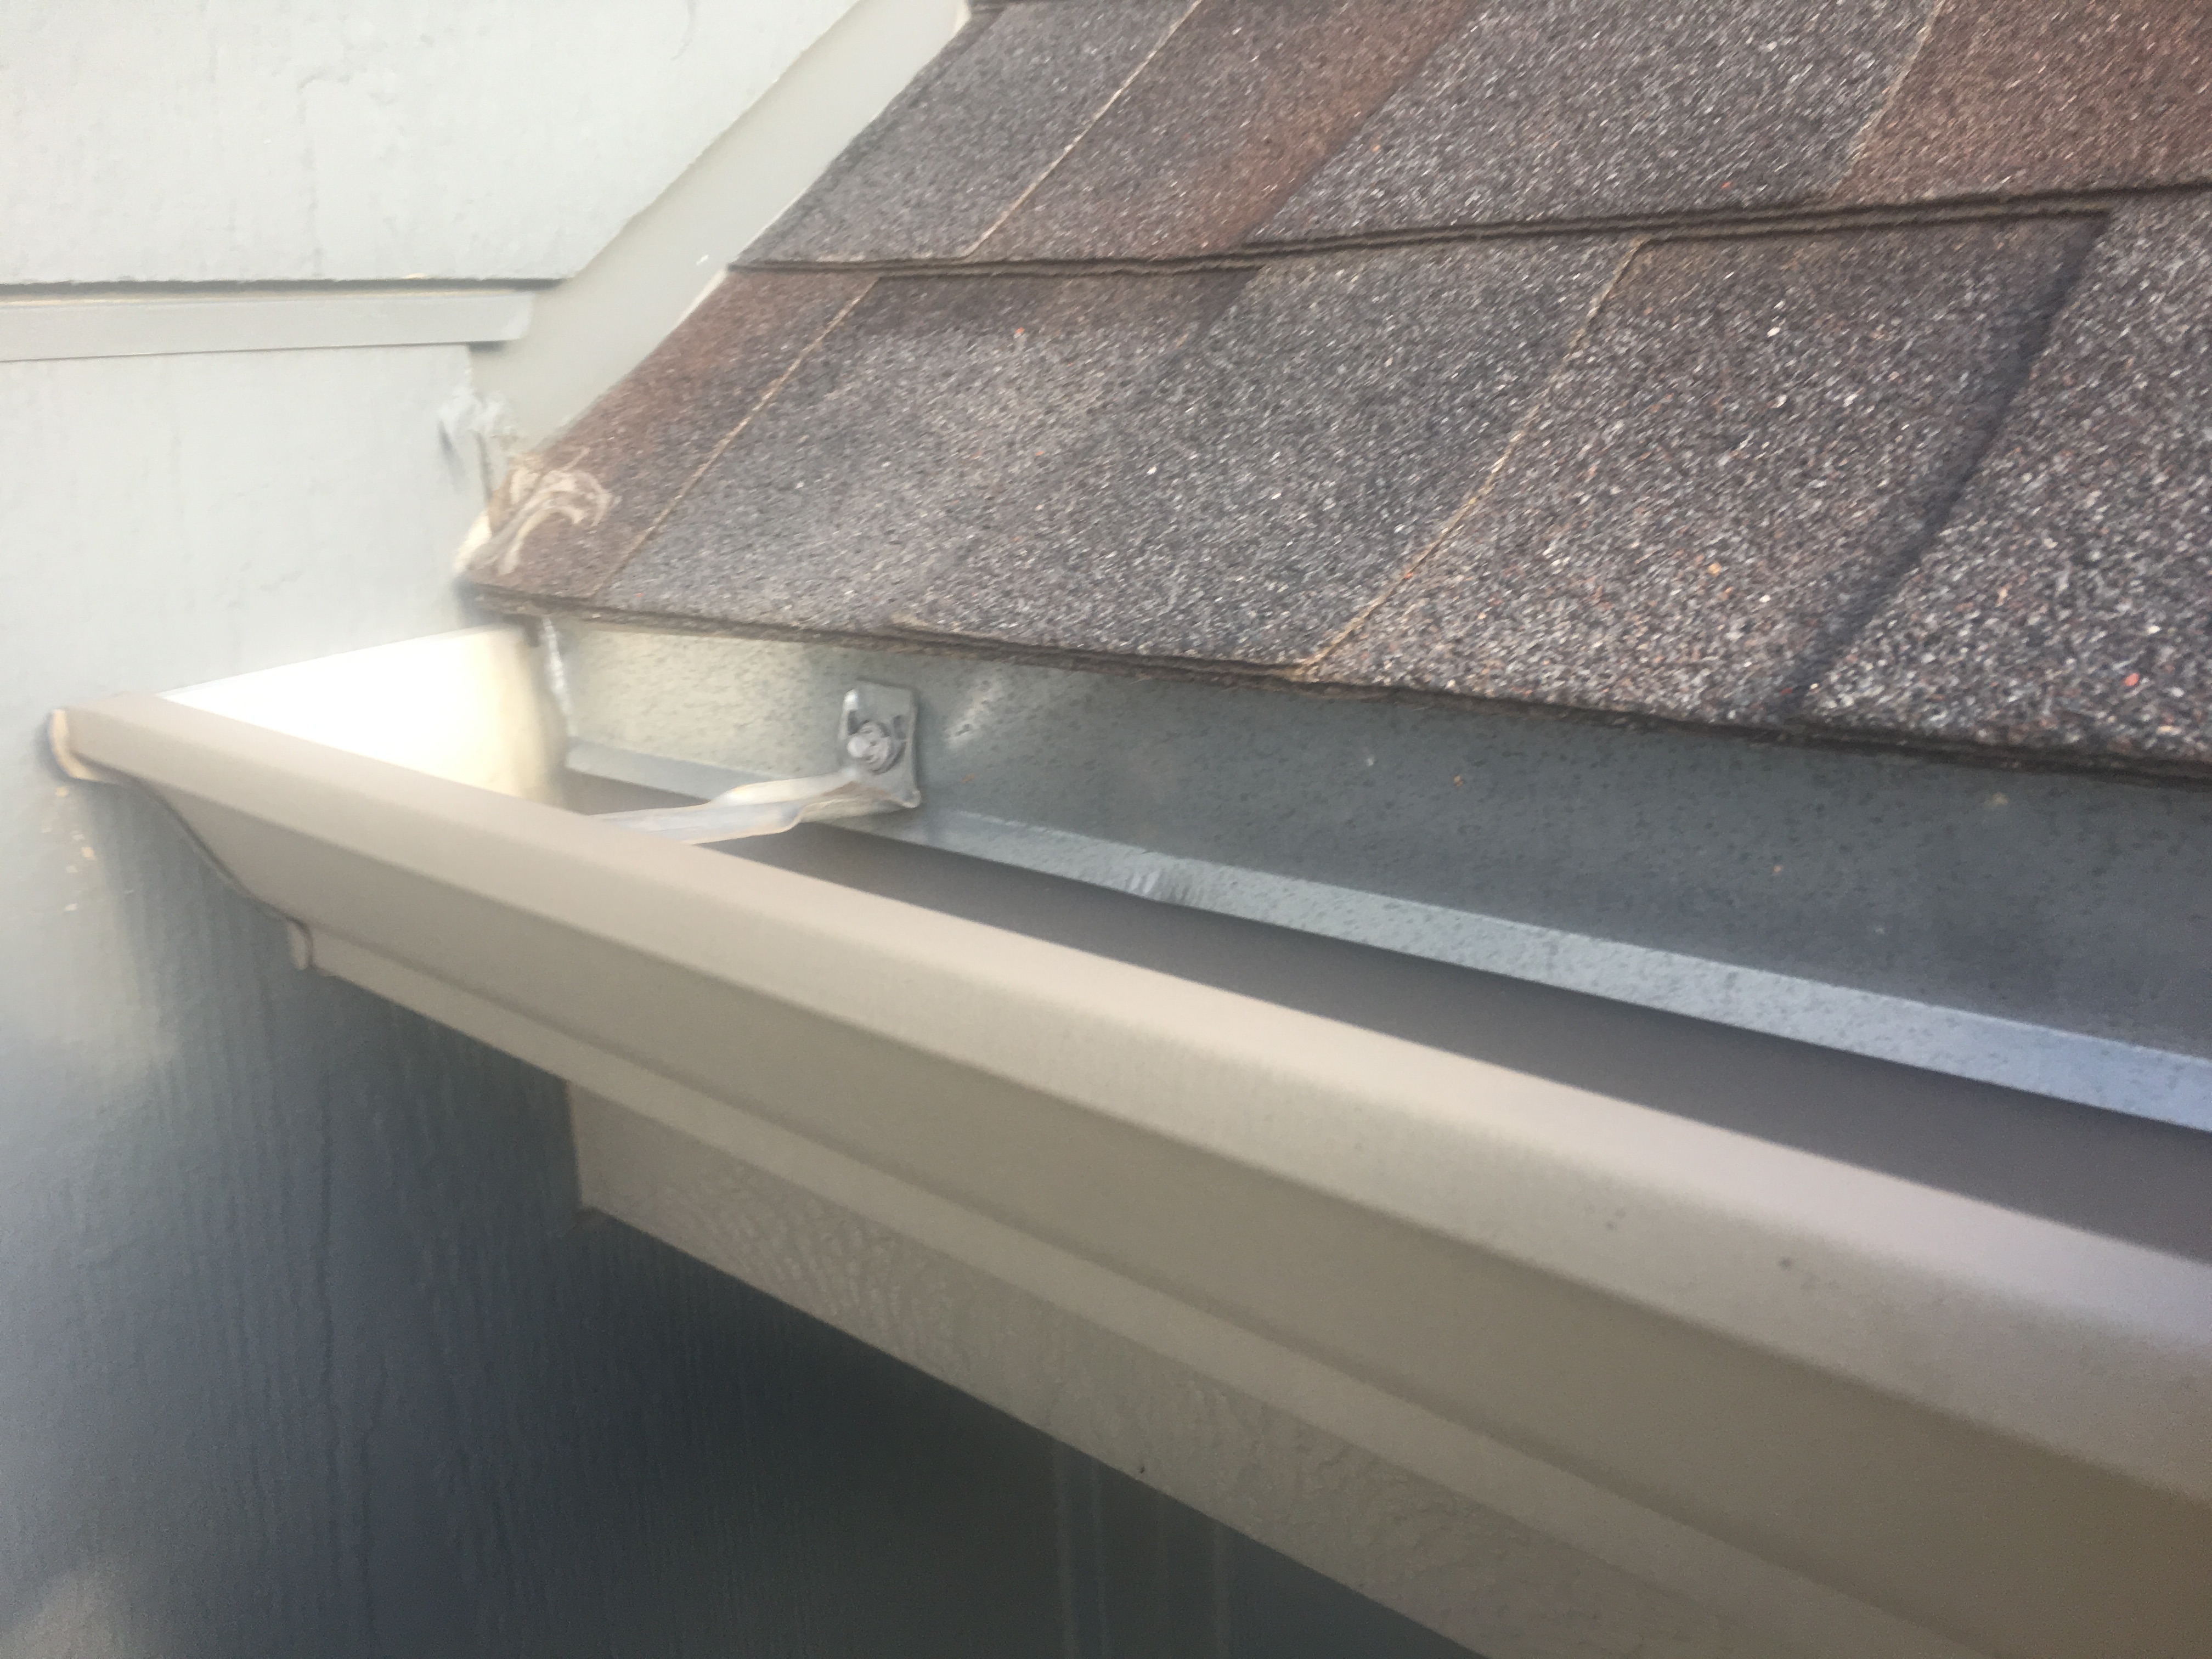
This picture represents many things found wrong with flashing while doing a roof inspection. Since flashing is basically a system, you must install it in the correct order to maintain the ability to properly divert rainwater. It appears that when the gutter was installed, they cut into the siding so as to butt the gutter up against the substrate. There doesn’t appear to be any end cap on the gutter trough. Now the substrate is exposed. There is caulking that is failing between the gutter end and the substrate. The step flashing is not overlapped properly and parts of it are cut and removed. There is no counter flashing nor is there any kick-out. With this installation, there is definitely going to be water intrusion causing more problems in the attic space, roof and sidewall substrates and possibly the interior of the home.
When it rains and water falls on a structure, the water has to go somewhere. Gravity pulls it downward. Many systems are in place on a structures roof to keep the structure dry. But what about when the water leaves the roof? If it isn’t properly diverted away from the structure, it will, more than likely, run back towards the foundation if the ground around the structure isn’t properly graded. That’s a good argument for the installation of gutters with proper downspouts and kickers at the ground level to get that water far enough away so that it won’t settle against the foundation and thus funnel into either the crawlspace or basement. If the water gets deep enough, it could actually start affecting the construction framing.
Laminate roofing in good condition. Eave has properly installed drip edge installed under adhesive water barrier nailed at least every 12 inches minimum. The shingles hang over the edge of drip flashing aproximently 1/3 of and inch. The shingles and gutters showed no loss of granulation. Gutters appear to be nailed through eves into rafters.
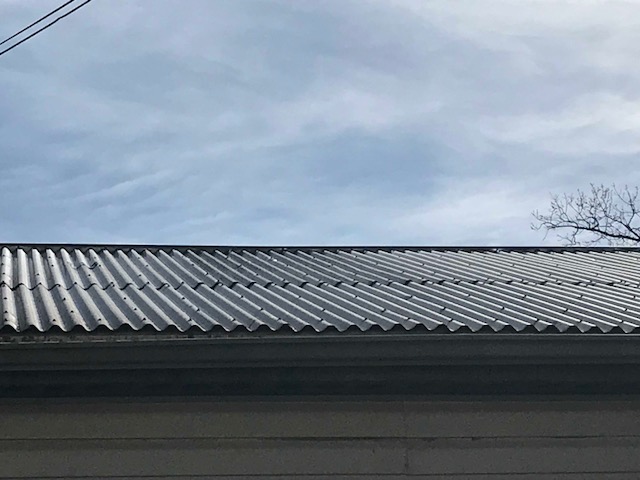
This is a photo of a corrugated metal roof. This type of roof is typically very durable with a life expectancy of 40-70 years. This roofing material is relatively low maintenance with the maintenance coming from changing out the screws due to dry rotted rubber gaskets.
After studying the image of the chimney flashing and breakdown. I am now fully able to discern the necessary flashing and sealants required for a properly installed and functioning roofing protection system surrounding a Chimney roofing penetration. The breakdown of the counterflashing and step flashing became very clear and I feel able to discern improper installation and repairs that may cause problems either currently or in the future and do not meet requirements
I had looked at the chart about shingle deterioration. It shows that by the time the shingles reach 30 years old that most will need replacing. Depending on the climate in the area some will need replacing before the 30 years.
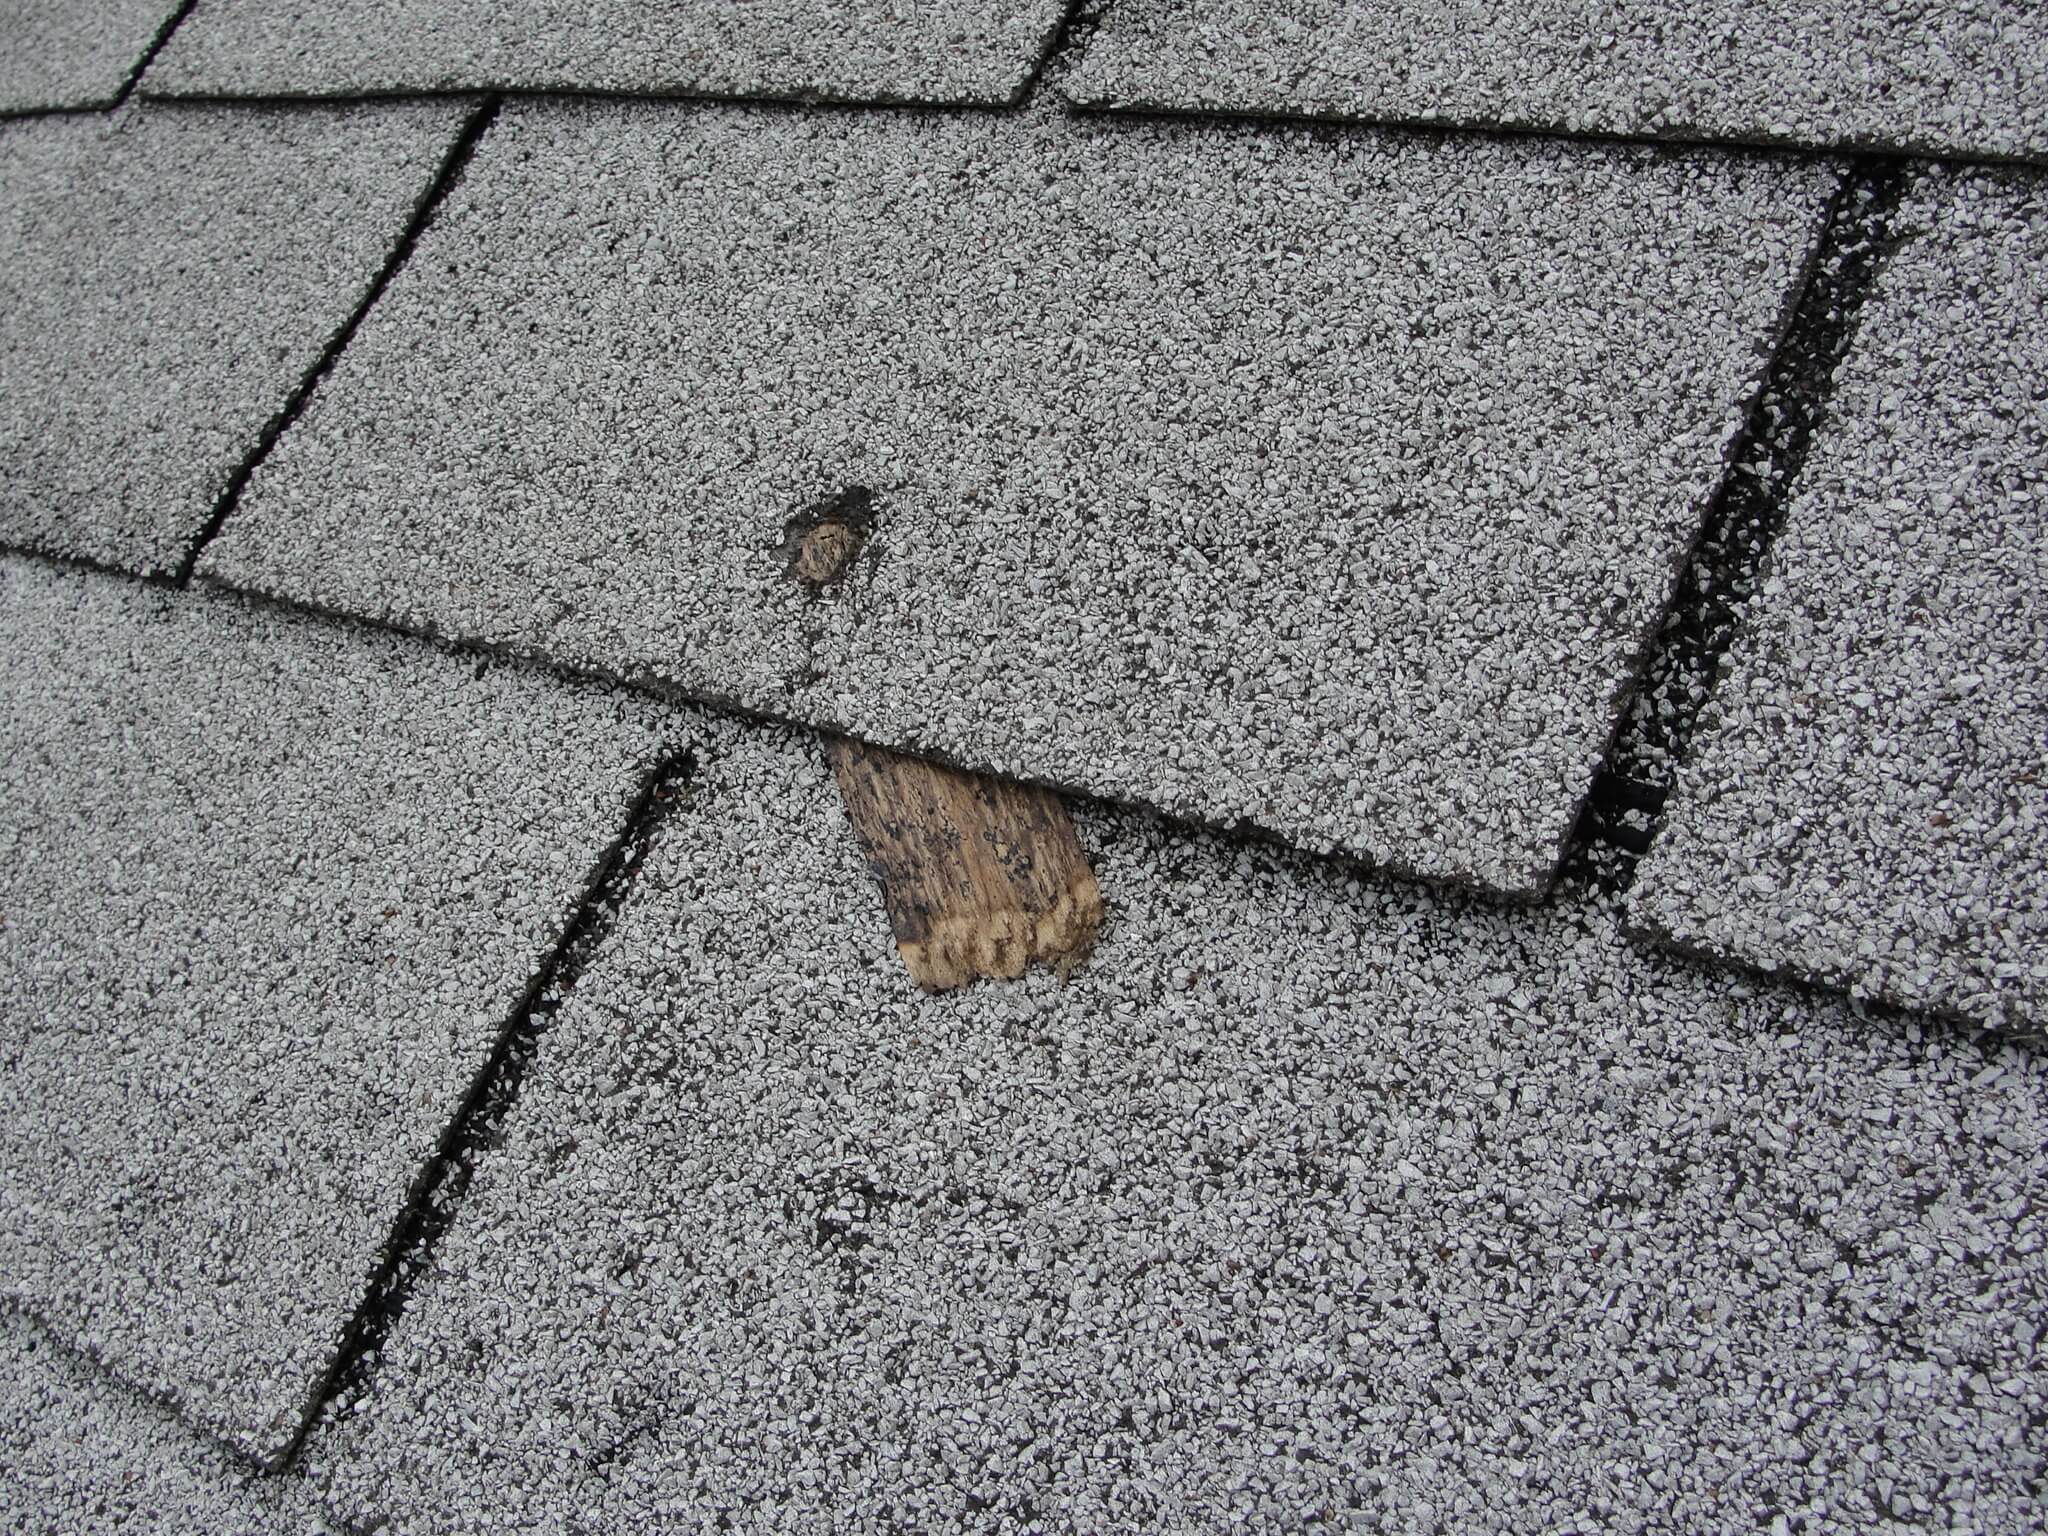
This is a photo of a nail improperly driven into the shingle. This may be a potential water penetration site. the nail should not be exposed and could cause water damage to the roof sheathing. this was located in the middle front slope of the roof covering.
I have learned in my research in how to inspect a gutter system that, i should look for the down-spouts to divert the water away from the structure at least 4 to 6 feet. If not the water can pool in the topsoil and wick into the foundation leading to water problems inside the structure, such as mold. also, the gutter should slope at a rate of 1/4 inch per 5 to 10 feet towards the down-spout. If the slope is any less than this the water will get back up and could spill over. I also learned the two main types of gutter system are k type and u type. The differnces are aesthetic and do not differ in function. I also learned to inspect all connections from the gutter sytstem to the downspouts. In high wind areas an extra flashing may need to be installed to prevent the water from running over the gutter and down the face of the walls, which could result in water damage to the foundation.
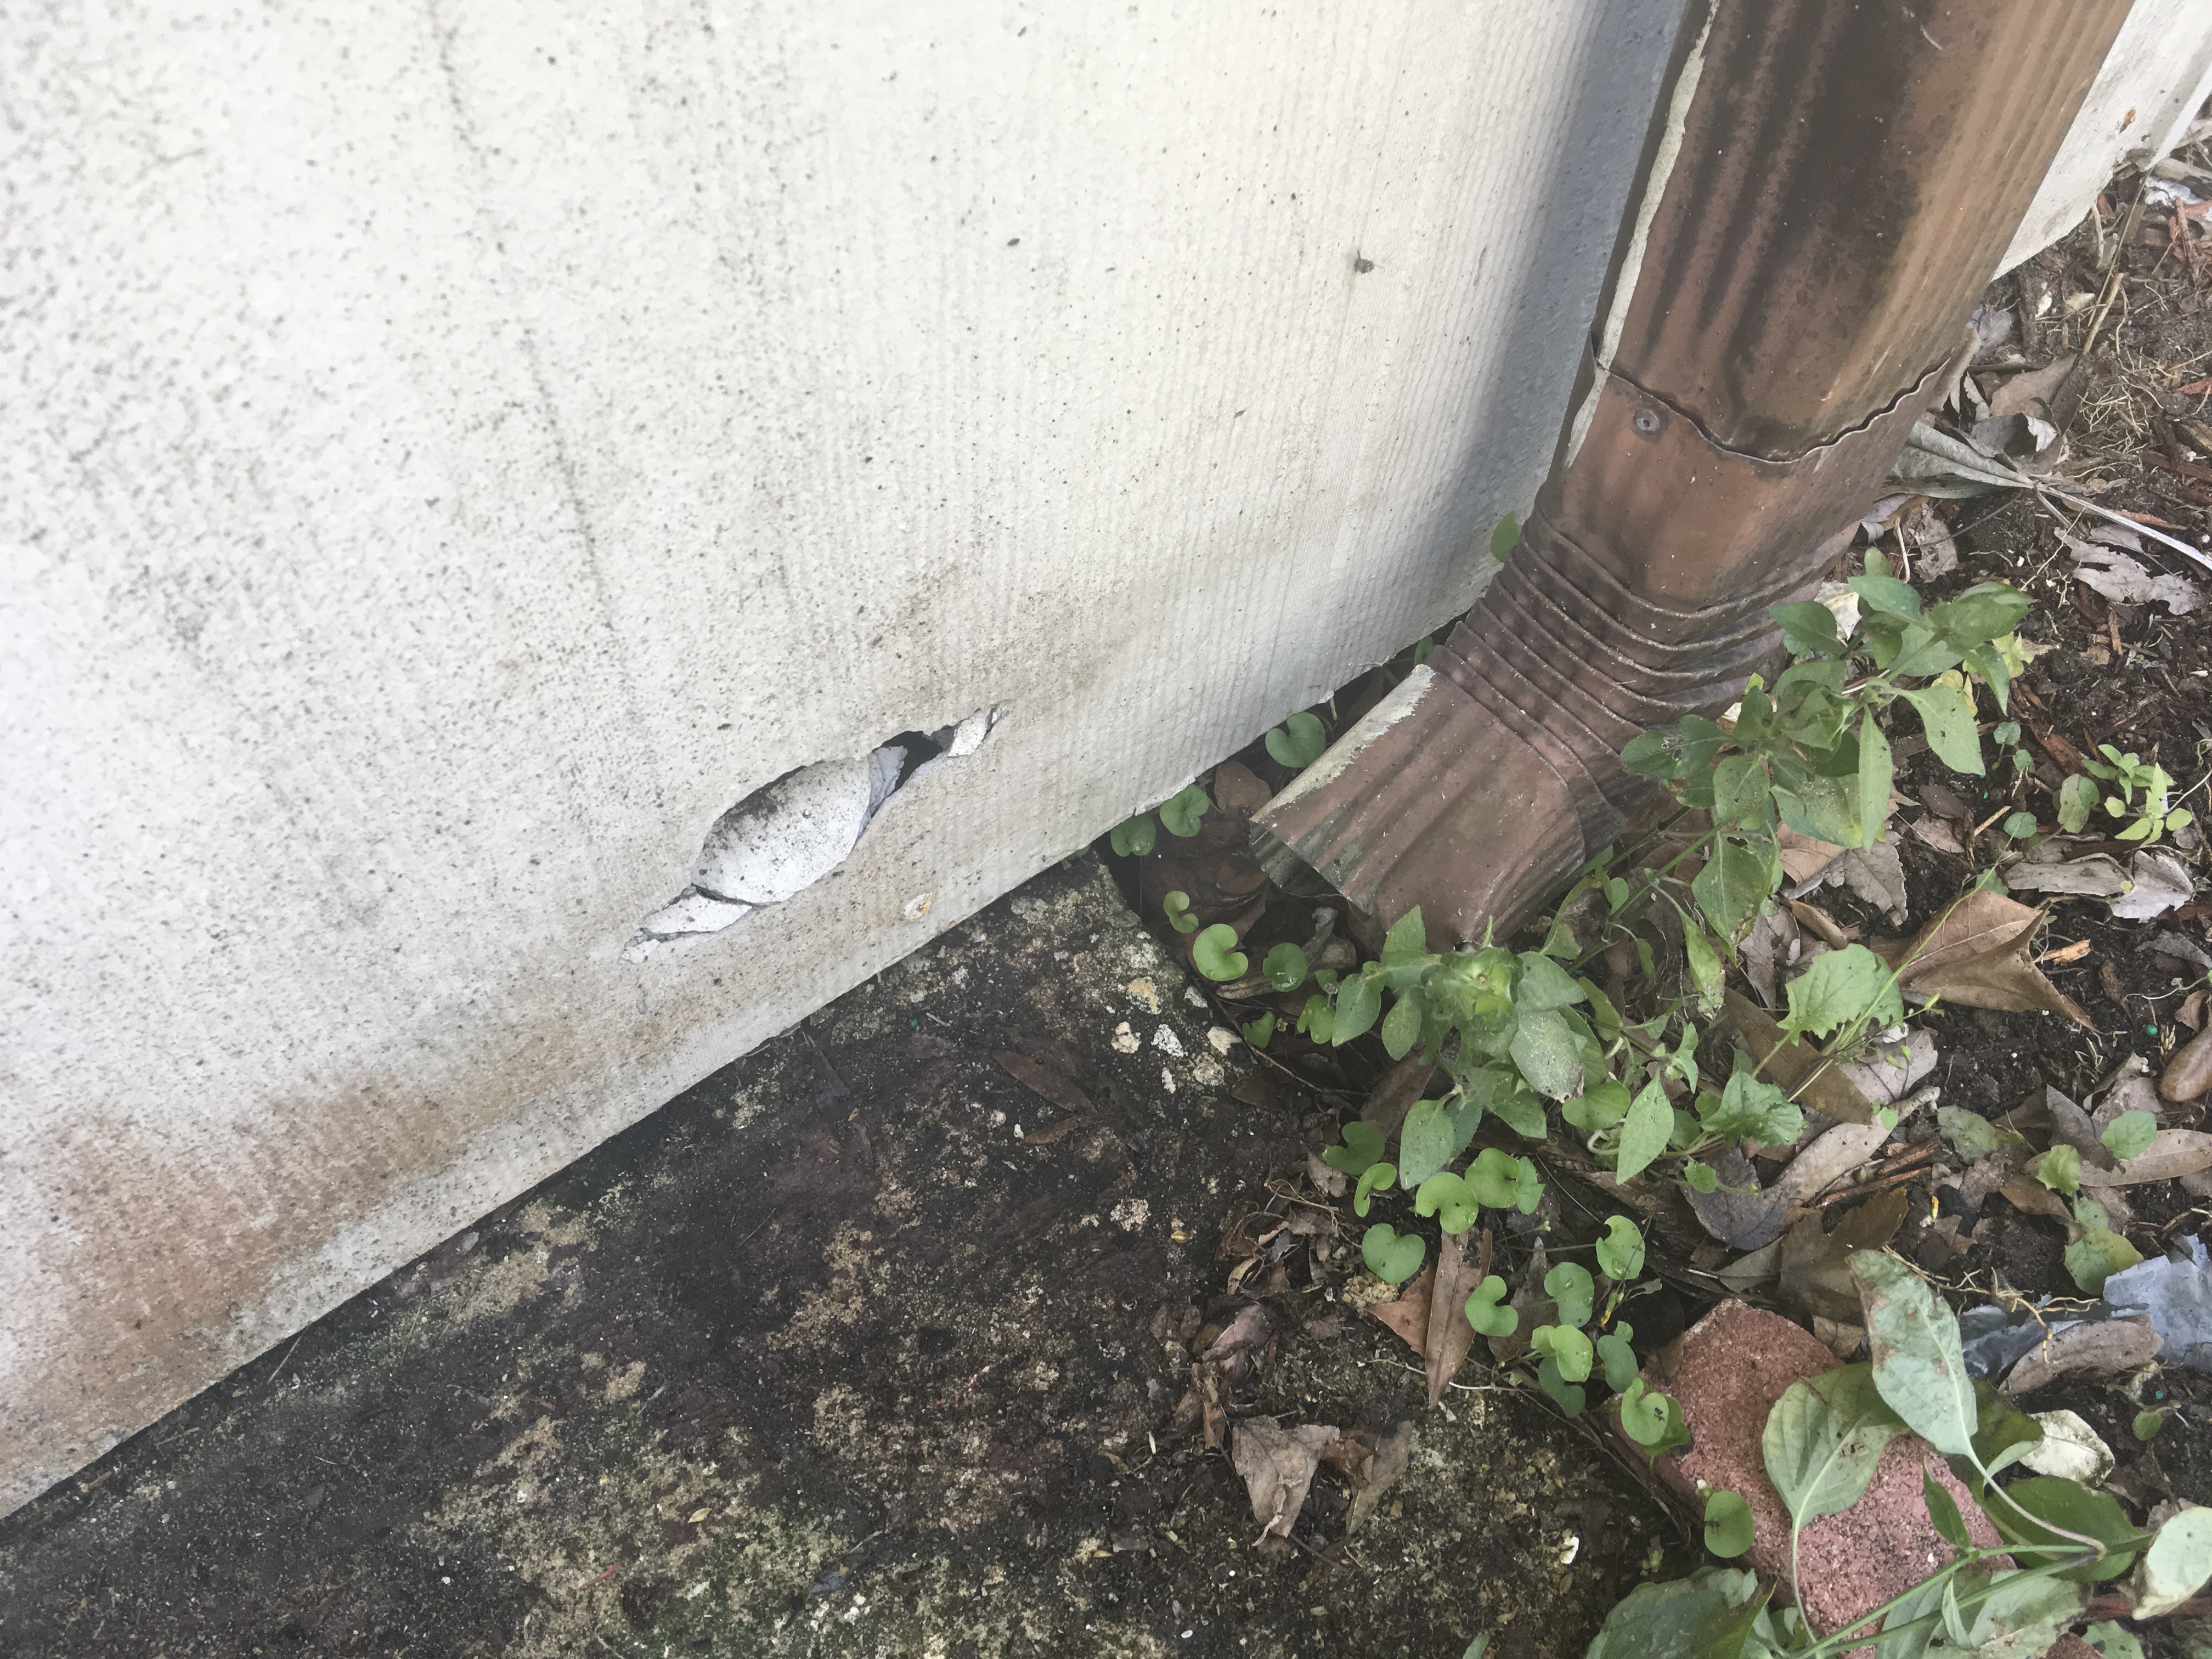
This is a picture of an improperly installed downspout directing water into the foundation of the home and directly towards a broken , possibly water damaged area of the siding. I recommend diverting the water away from the home and inspefurther inspection of the siding for mold and water damage.
While inspecting the gutter system on the front of the house I found that the gutter slopes away from the downspout not allowing proper drainage. The joint on the low end is showing signs of leaking . The downspout directs water directly into the foundation and siding. The siding is showing signs of water damage from improperly directed water flow from the downspout.
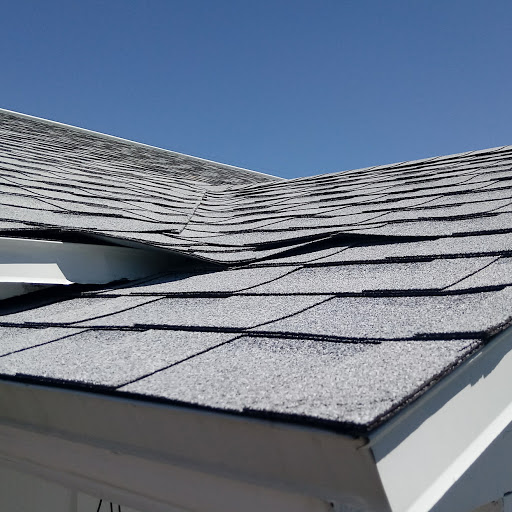
Inspection of fiberglass architectural shingle roof from ladder. Shingle condition was good and observation was made that this is a single layer. Drip cap is found to be properly installed and overlaps under-course on rake and under-course overlaps drip cap at eave.
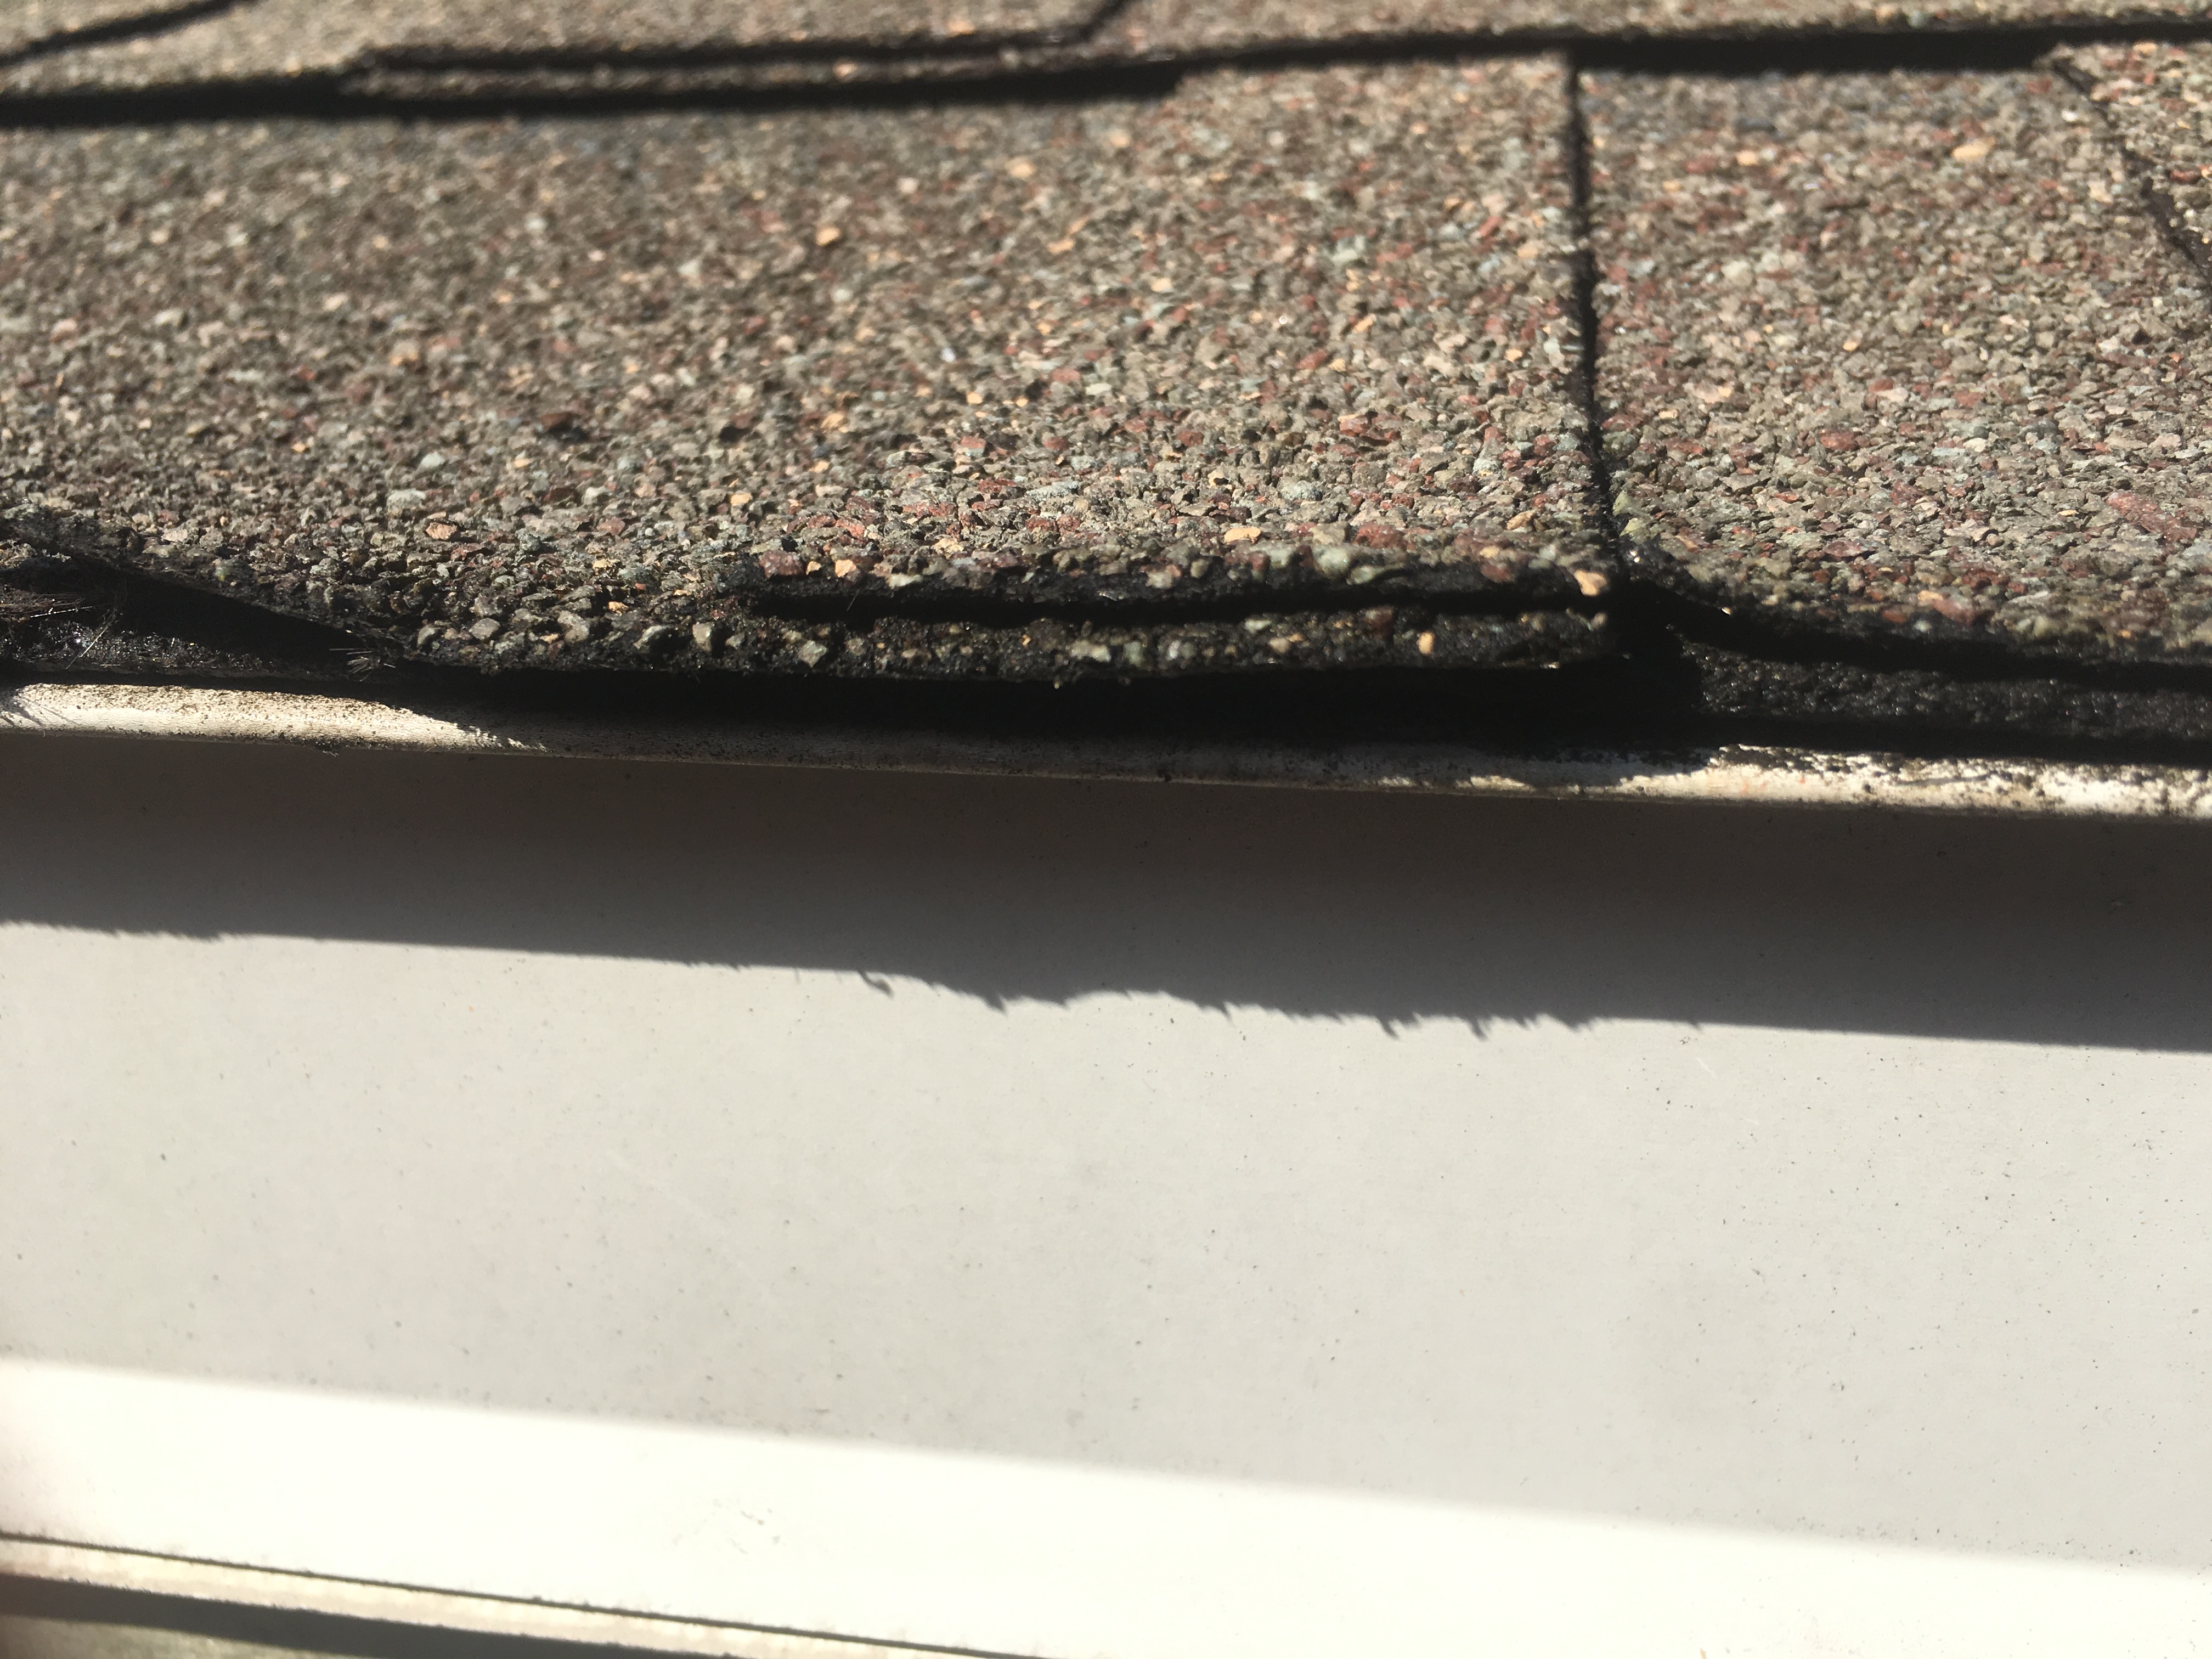
There is a bump/wrinkle in the roof at the bottom of the closed cut valley and the drip cap to the left is damaged and not installed properly. Recommend further inspection by qualified roofer.
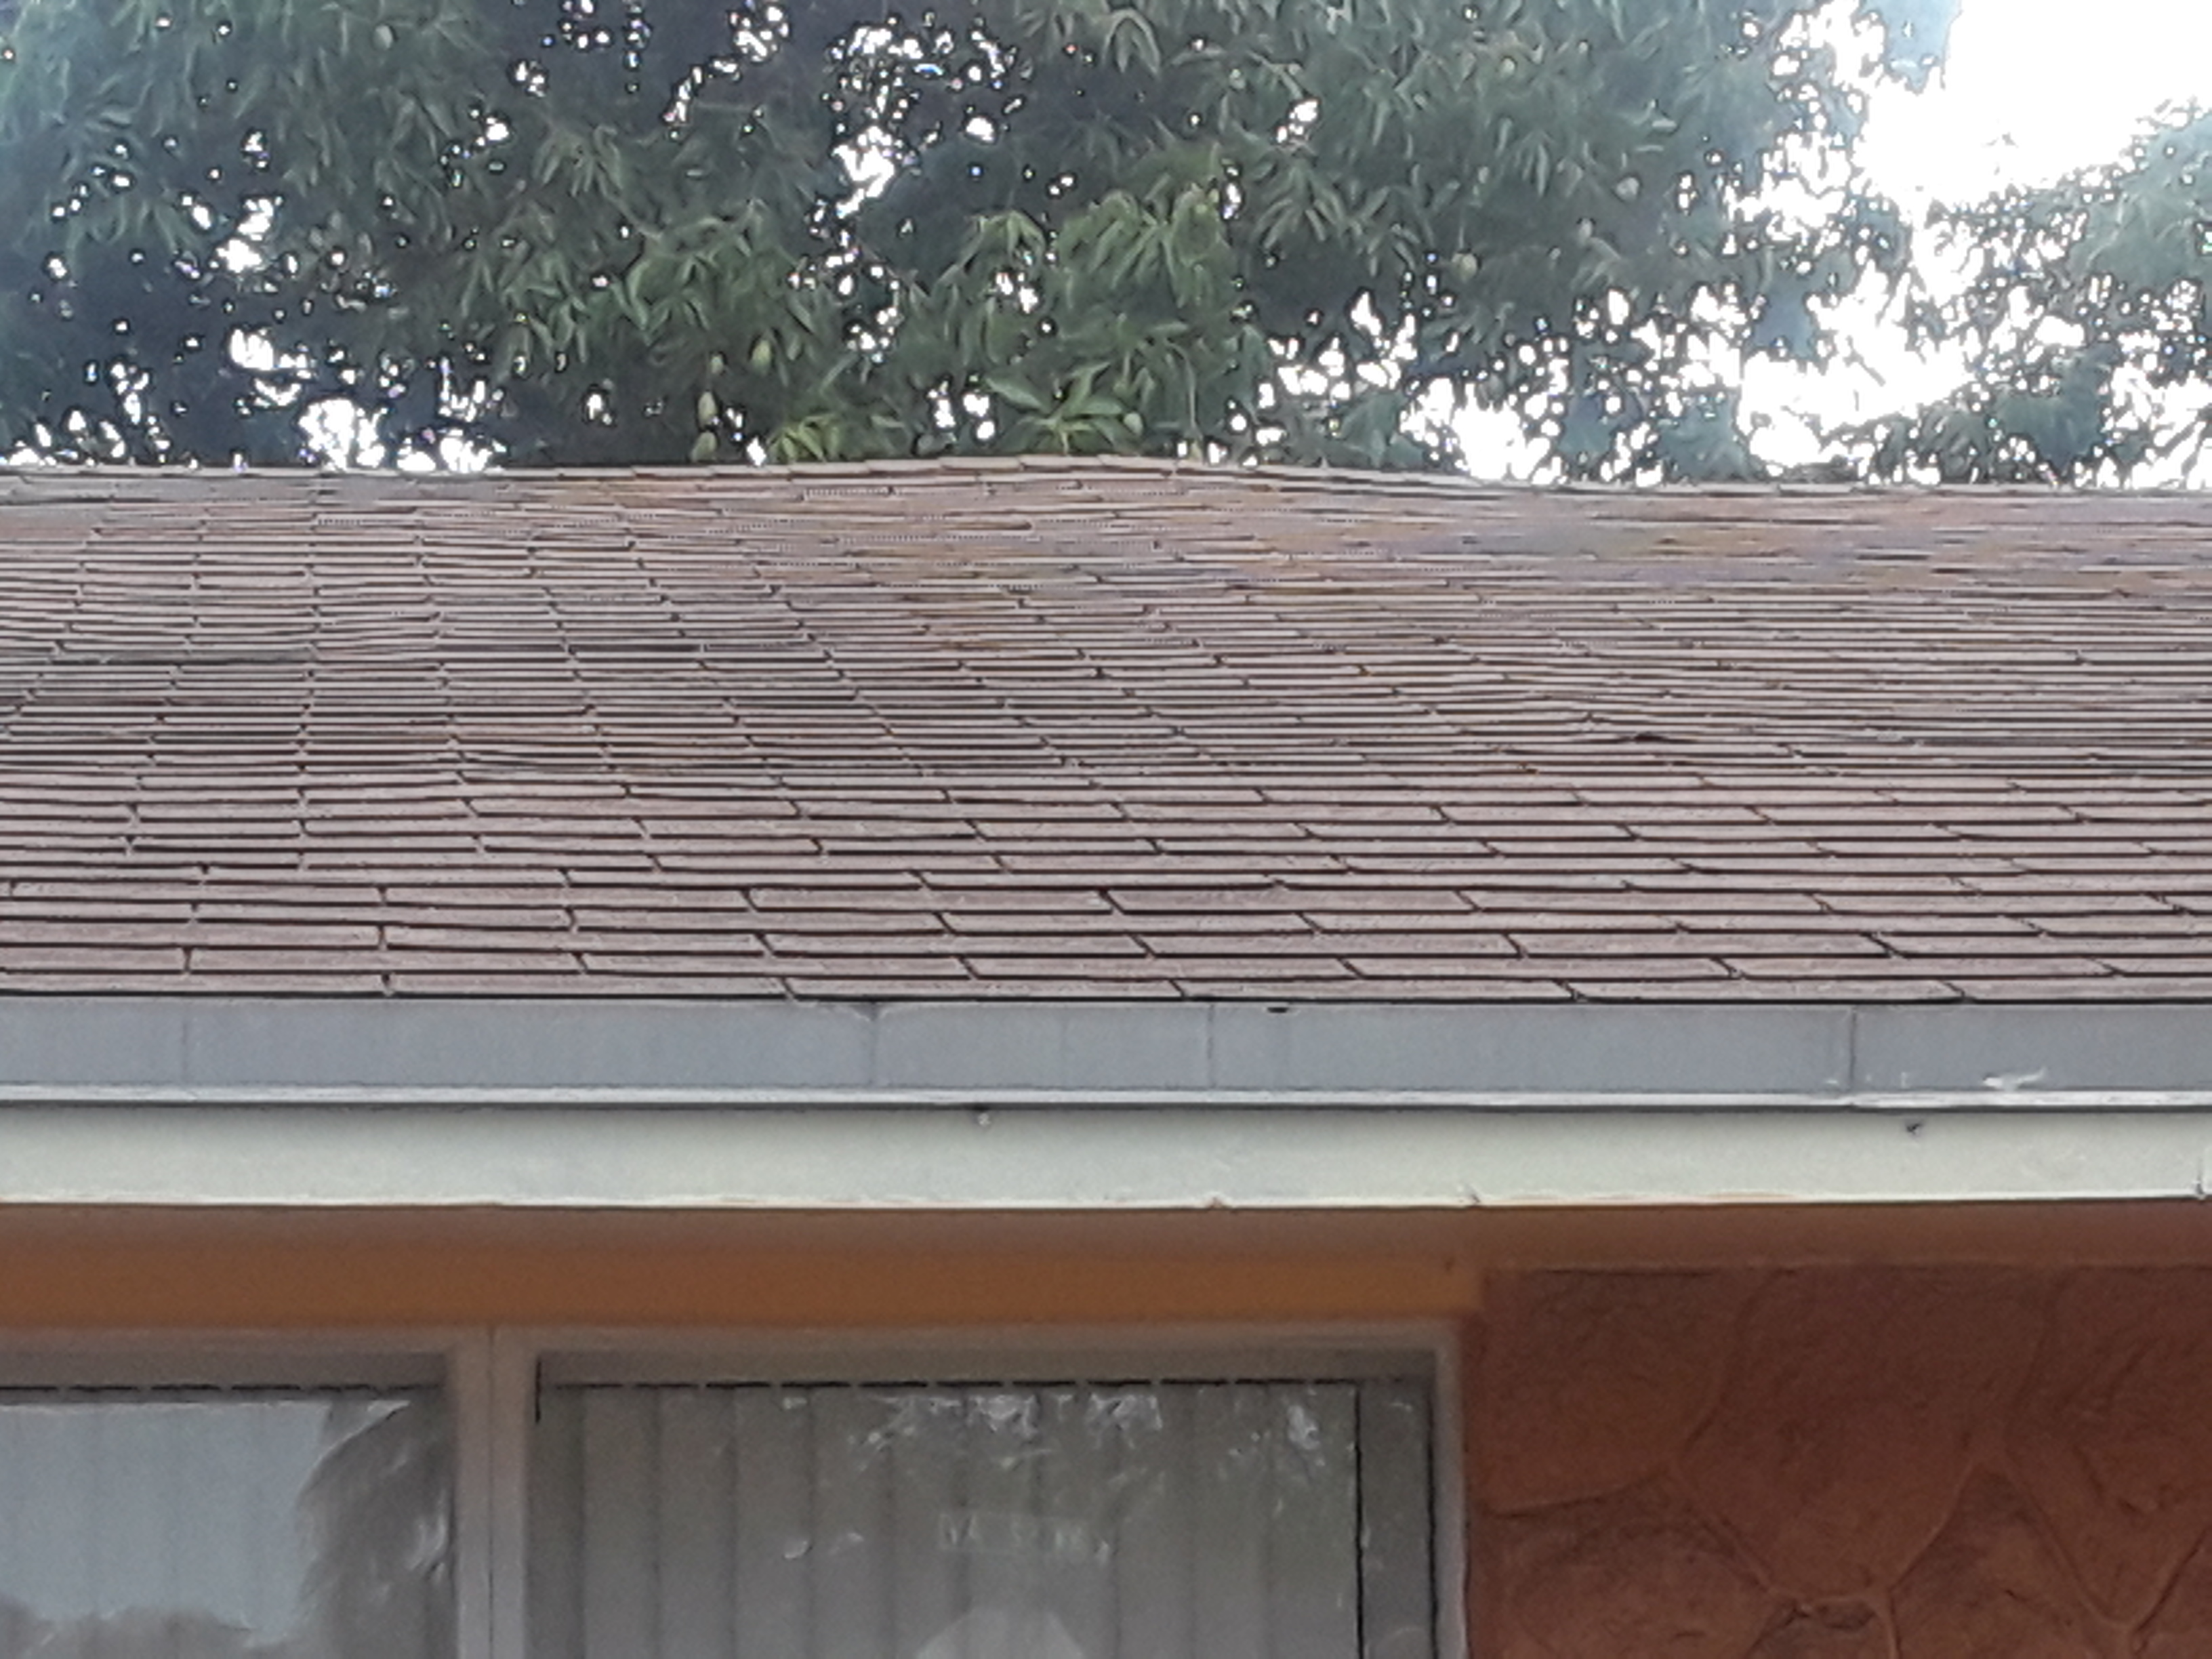
this roof is one layer of architectural asphault roofing that seems to be a few years old.It is missing drip flashing and rake flashing.Roof appears to be in good shape.facsia boards have some rot in certain areas.Vent pipe flashings are in good shape
collar vs rafter ties,collar ties are both horizontal roof-framing members,each with different purposes and requirements.A collar tie is a tension tie in the upper third of gable rafters that is intended to resist rafter separation from the ridge beam during periods of unbalanced loads.Rafter ties is a tension tie in the lower third of opposing gable rafters that is intended to resist the outward thrust of the rafter under a load.
On the topic of WDO Clearance there are two basic concerns. Of utmost importance is the separation of wood from the ground. This can be accomplished by distance or barriers. Barriers can consist of treated lumber or termite shields. When barriers are properly installed there is a minimum distance of 8 inches. At other times the separation is a minimum of 12 inches. When a beam sits on concrete it is also important that there be a moisture barrier between the beam and the concrete. Moisture and soil are the enemies.
This photo shows a 3-tab asphalt shingled roof with a drip flashing installed after the gutter was installed onto the fascia. There is one layer of shingles and are no signs of deterioration or debris in the gutter. The drip flashing and shingles overhang 1/4" over the gutter.
This image is of a roof from ground level. There is proper drip edge installed around the roof and under layering. This roof has a standard 3 shingles setup. There is no visual signs of cosmetic damage all shingles are intact.