Below is a typical Ground Fault Circuit Interrupt (GFCI) receptacle that one would see in many homes today. The tester showed that the receptacle was wired correctly as shewn here by the two amber indicator lights. In addition in the bottom right hand corner a small green light can also be seen that indicates that it is in working order. I tested the receptacle both with the circuit tester and then with the test button located on the devise to insure that it was functioning as intended.

This is an exterior outlet with an open ground this is a hazard and should be corrected.
While this house pre-dates GFCI’s all exterior outlets should be GFCI protected and have a weather tight cover. At the bottom of the pic you can see that cord is spliced and is exposed to rain water this also looked to be done incorrectly, as it was spliced with shiny electrical tape which is indicative of home owner repair. Recommendation to have a licensed election.

15 Tools Every Homeowner Should Own
For this short reading assignment I chose 15 Tools Every Homeowner Should Own. This has interest to me because once I start my home inspection business I would like to provide many resources for my clients pertaining to their new home. One of the tools that I did not expect to see was “a plunger”. Definitely a good tool to have but it was not something that I probably would have thought of. Another good idea was a “torpedo level”. That made me think that this might be a great promotional item as well.
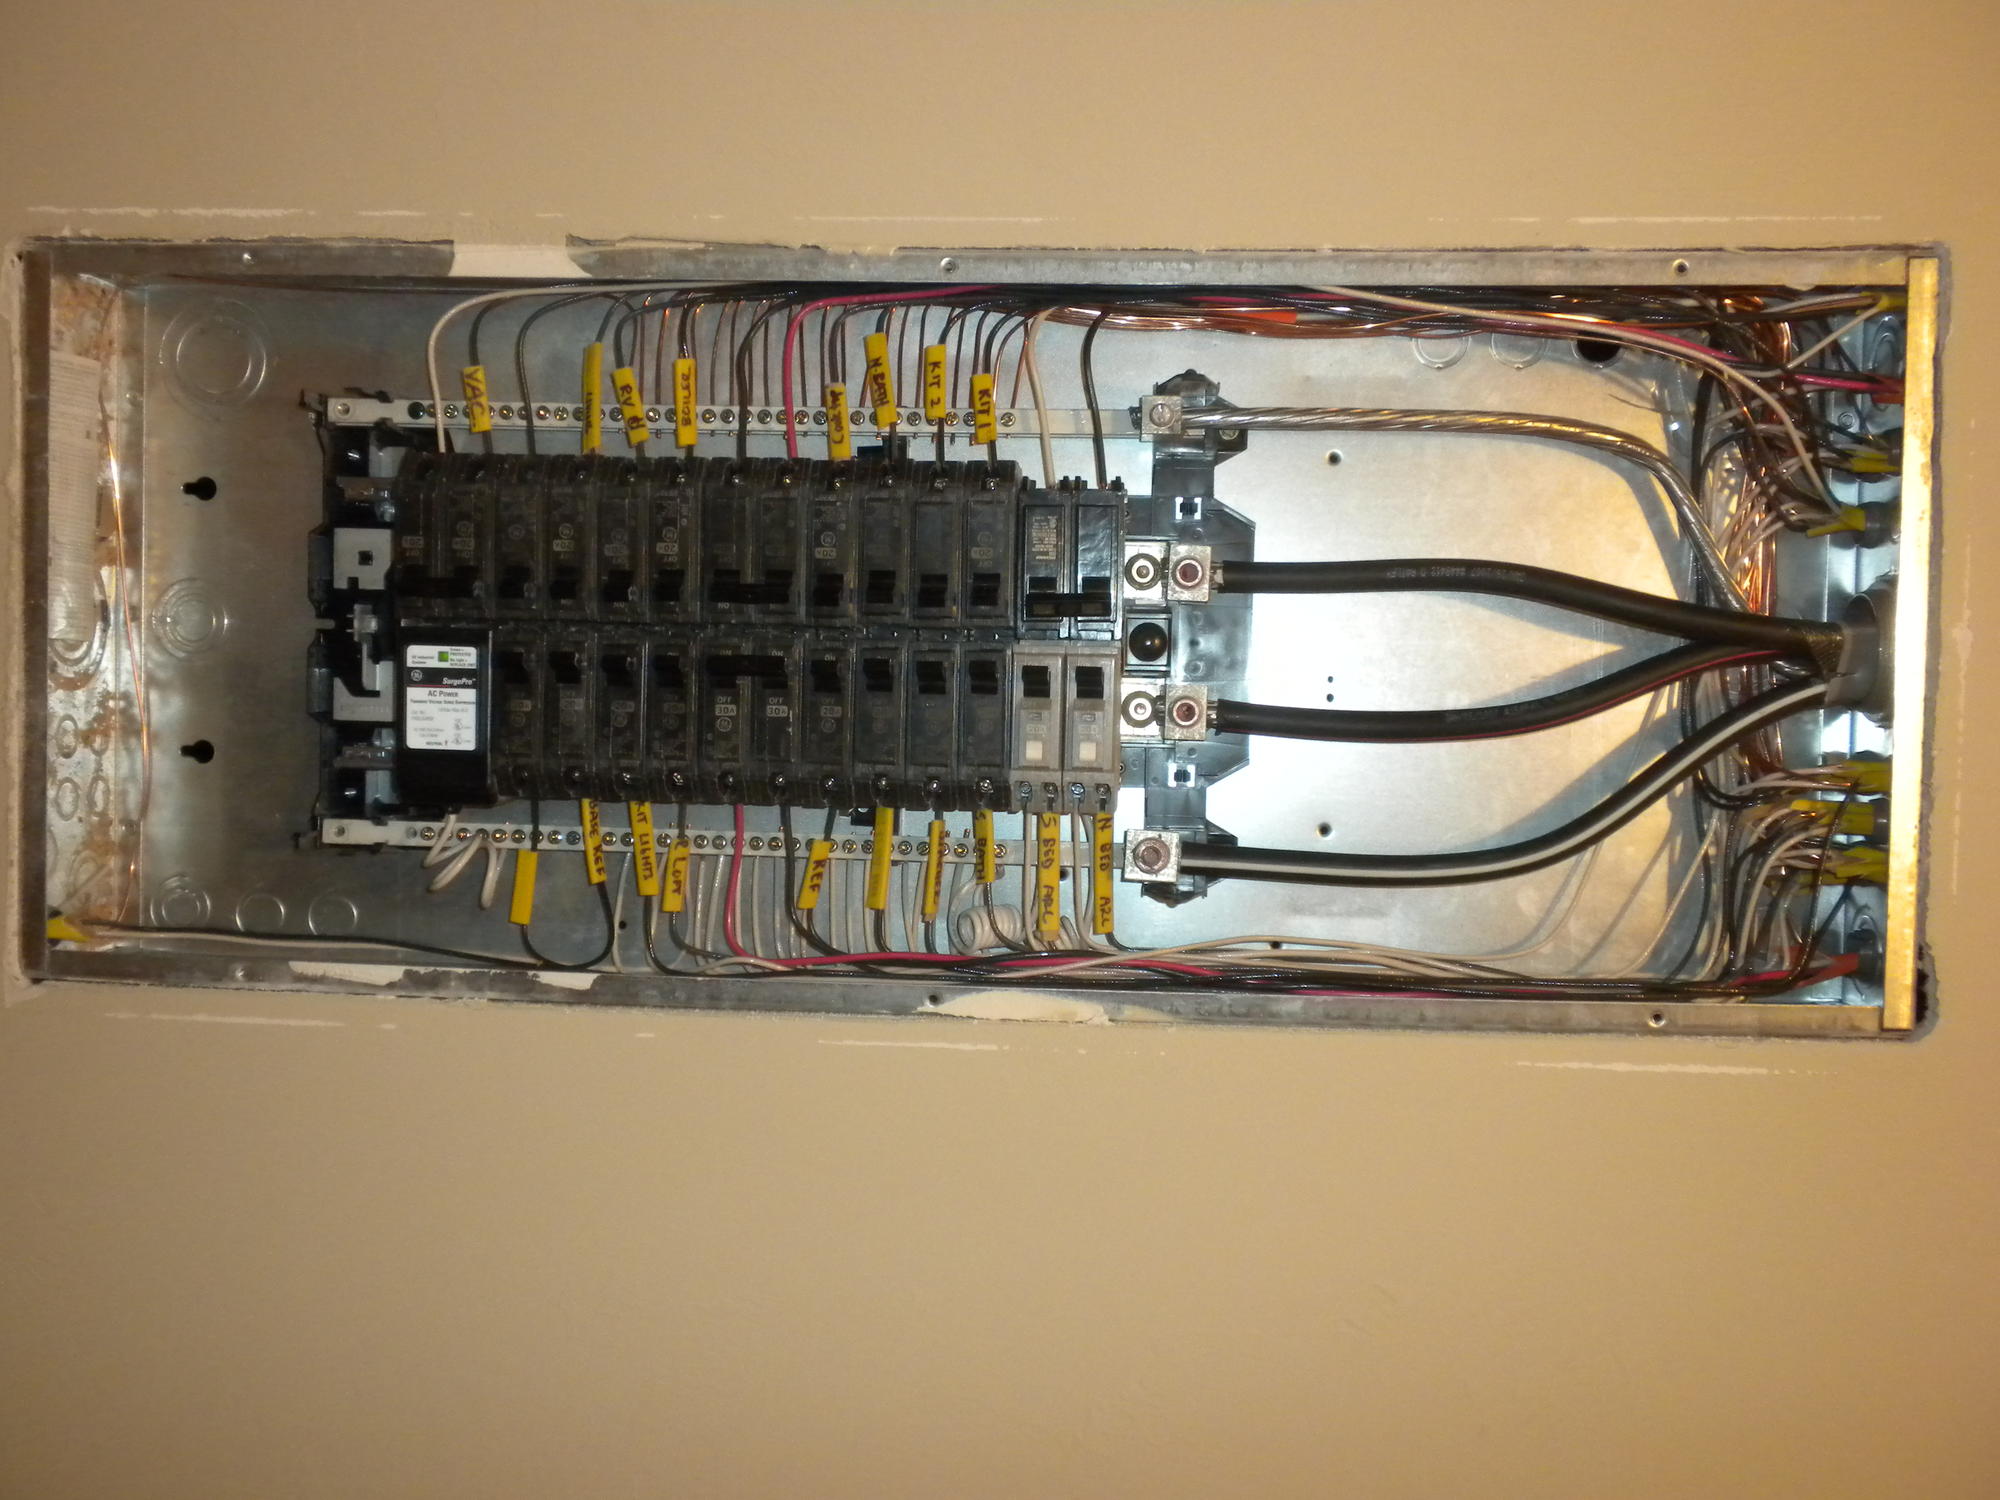
For my inspection essay I choose what is perhaps one of the best Main Electrical Panels I have inspected. The cabling is all neatly laid in the panel, beside the panel cover being label the electrician used pieces of the NM cable sheathing to identify the circuits when the cover is removed. Yet, you will notice that for two of the 240 volt circuits the electrician did not mark the white wire with black tape to identify it as a hot conductor.

The accompanying photo is from a electrical panel box with the cover removed. There are several issues, many of the neutral, ground bus terminals are double tapped. When examining, you can see burning marks in the upper left. This needs to be referred to a qualified electrician.

I choose the article on IR Cameras: Electrical Inspections. This is particularly interesting to me and informative since I am interested in adding this to my inspection service. The fact that it is non-intrusive, fast and accurate make it very desirable. I also like the ability to see overloaded circuits and wiring, as well as excessively hot or loose connections, just to name a few.
For this portion of the assignment I studied both illustrations and read the article on Electrical panel safety. I have in the past moved fearlessly around electrical panels and have gained much more respect for the inherent dangers associated with these currents. I suppose the two most important I learned from the article are; protect your client (if he/she is bird dogging) and be cerrtain of your escape path.
The attached image is the main service panel with multiple grounded conductors (neutral wires) sharing a similar lug on a bus bar. Grounded conductors are current carrying. Multiple grounded conductors under a similar lug pose a potential hazard for overheating and arcing. A licensed electrical contractor should evaluate and ensure that the grounded conductors are isolated to a dedicated lug each (only one conductor per lug).

Single strand, aluminum wiring was a common conductor material used in residential construction from 1965 to 1973. Aluminum was used over copper due to the elevated cost of copper during this time period. Inspectors must be aware of the concerns regarding the use of single strand, aluminum wiring. Common concerns relate to the higher risk of poor connections within the electrical system and oxidation of the metal, leading to potential arc hazards. Inspectors should report the presence of single strand, aluminum wiring and advise the home-buyer to consult with a licensed electrical contractor to have the electrical system evaluated.
I inspected this electrical panel the other day for any kind of defects that may be present. As we can see by the photograph there are no bushings on any of the wires coming in to the main electrical panel. Additionally, the white wire in the front of the panel is damaged/cut from rubbing up against the metal edge of the electric panel which if a bushing was properly installed it would have prevented this defect. I recommended the client that bushing be installed on the wires entering the panel.
I researched the article on electrical service panels because it was relevant to this subject of the course. In this article it discusses some things inspectors should be looking for such as sharp tipped screws in the panel that can pierce electrical wires. Evidence of moisture penetration in the panel should be reported to the clients and any damaged or burnt wires or beakers should be reported in the inspection report.
I took this picture while looking to purchase the house as an investment opportunity. It was located on a wall behind a tripping hazard in a dark room in the basement. Needless to say it’s condition and some other items scared me away. When I sent this picture to an electrician friend he didn’t take it serious at first. Then said it would need changed out.

The article I chose to research was panel from hell. I found this article extremely beneficial, it depicts many common deficits in the main panel, sub panel & meter box. These pictures pointing out numerous types of wiring defects have opened my eyes as to what to look for when inspecting electrical panels and meter boxes. This is one I will review from time to time.
Hello
Let the fun begin.
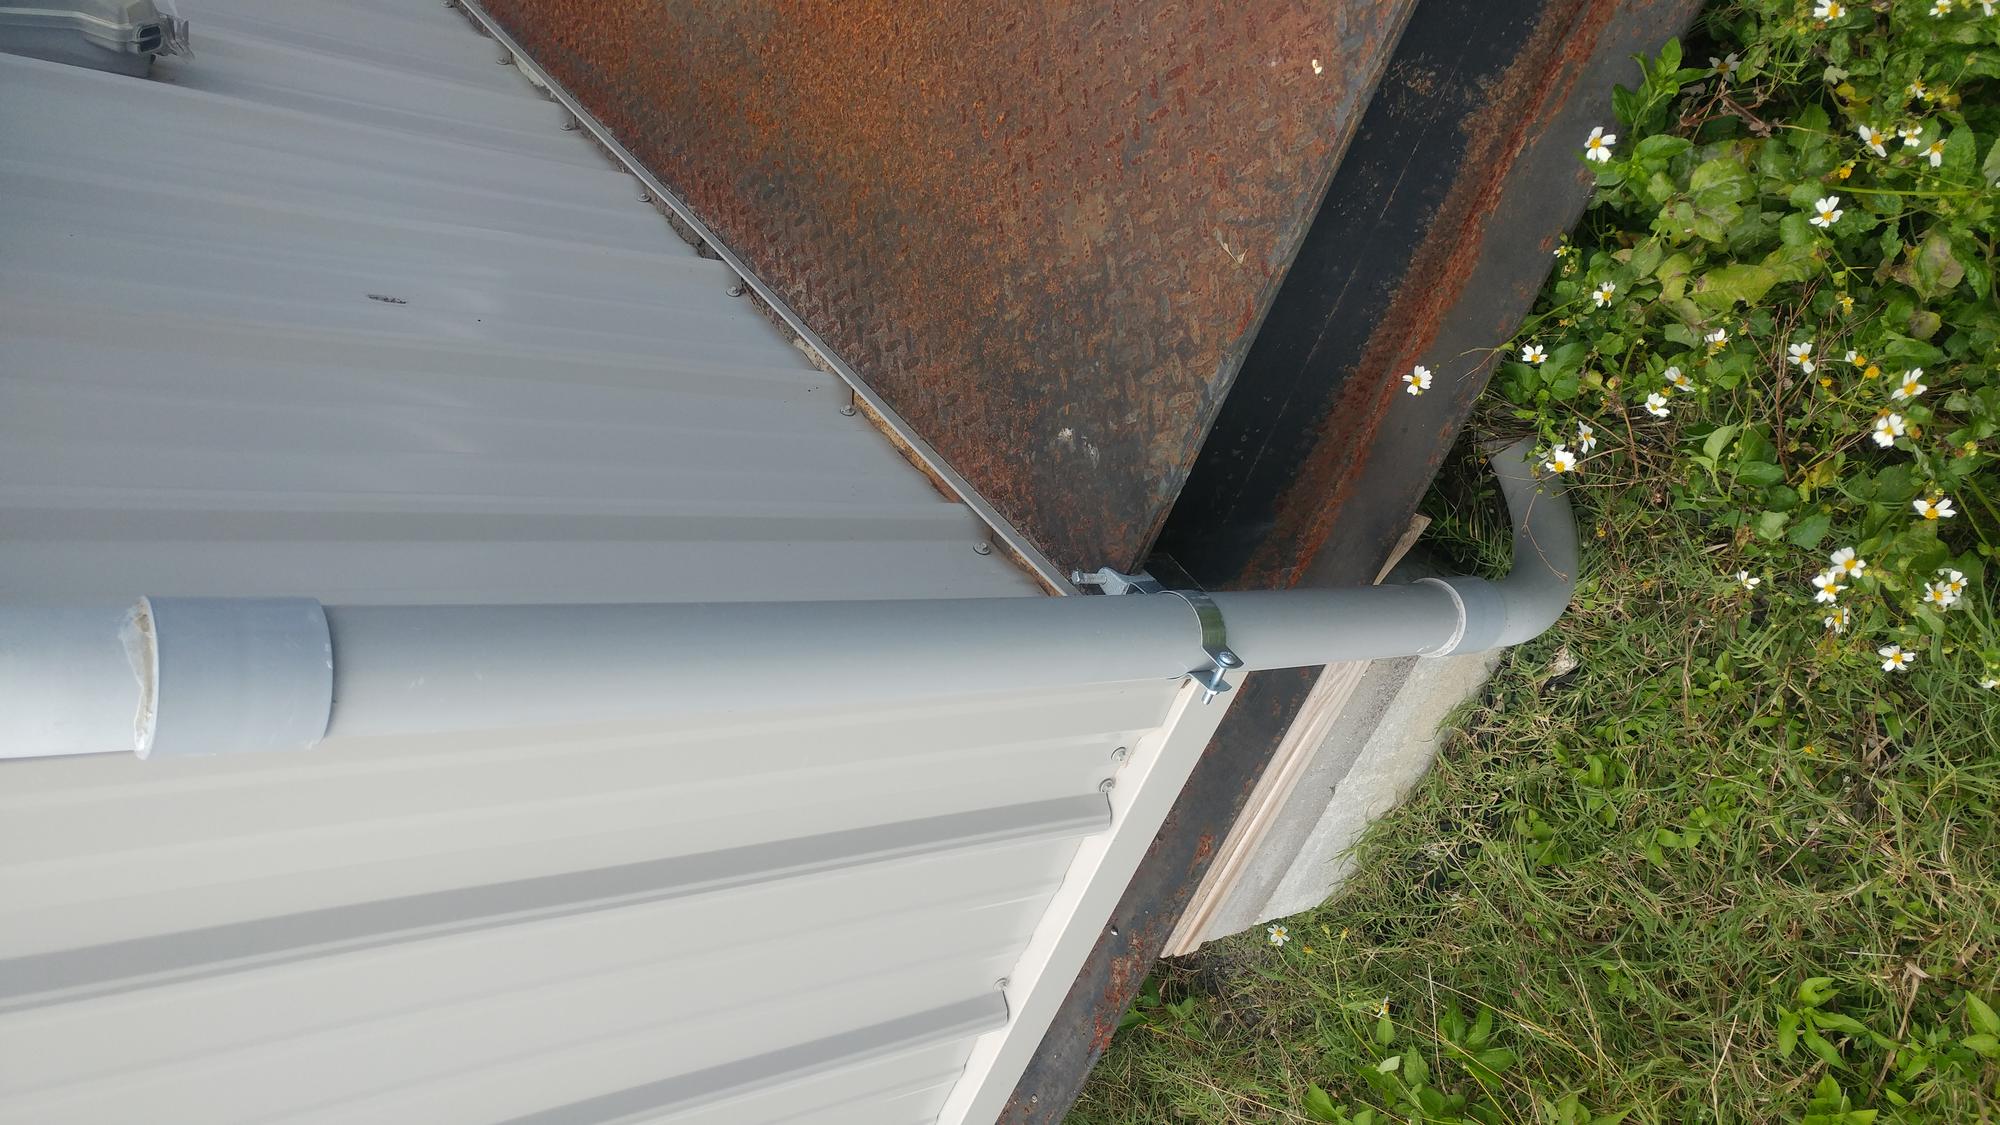
This is a Square D 225/Amp main panel located on the exterior of a manufactured home. The main panel electrical supply is fed underground (lateral service) in grey schedule 40 rigid conduit with no signs of disrepair and all connections tight and secure. The cover screws are appropriate for this panel and there are no open tabs present on panel cover. All breakers are square d and correct for this panel. The breakers are all clearly numbered and the door has a clearly readable legend for each breaker. You will notice circuit # 6 and 8 are both AFCI breakers that supply both bedrooms. There wet areas like bath and kitchen are not supplied by GFCIs, but are protected ant the receptical. I didn’t remove the cover of the panel so it is unknown what shape the inside is.


Attached is an image of a client’s attic where I have noticed open wiring spliced that is not in an enclosed box or electrical panel. After noticing this in the attic, I decided to look closer into the junction box and breaker panel. No seen defects there and was clean and neatly organized/labeled. Speaking with the client, I informed her all looked great in service panels and beaker location, but after time and possible moisture damage, the loose and open wiring/splicing could eventually lead to a fire and should be looked at by a licensed electrician.

I chose to do my research on what I found in the inspection Graphics Library called, “120/240 Volts”. This image portrays how the service drop coming from the transformers meets the service panel. It shows how bothe the transformer/power line is grounded, as well as the service panel at the home. Something I learned is the that the 240 volts that supply consists of three wires in this case. 2 hot wires consisting of 120 volts each and one grounding wire. This is what will efficiently supply the home for all their needs.


I decided to remove the dead front of my home’s service panel. My home was built in the 1950’s and I discovered a combination of aluminum and copper wiring used in the electrical system. There were several issues with my panel, but it was difficult to determine because of the amount of wiring actually entering the panel. It looked as though the house was re-wired at some point and none of the old wiring was removed, it was just capped and stuffed to the side of the housing.
Some of the problems I could identify are as follows.
- The service panel had improper labeling with several of the breakers not being labeled at all.
- There is no bushing on the top entry point of the box leaving the wiring susceptible to rubbing/stripping.
- The screws used to fasten the panel have a boring tip instead of the standard flat machine screw called for to fasten the dead front cover.
- Several of the hot wires used had white coating. The proper way to use that is to attach black electrical tape to mark it as a hot wire instead of a neutral.
This picture is from a house I inspected a few years ago. As you can see the amount of wiring coming through the access hole in the breaker panel is a excessive. Possible corrective action would be to install another breaker panel and move some of the wires and breakers.

My research article was Electrical Service Panels by Nick Gromicko. The article highlighted the importance of safe practices and maintaining a safe working space while inspecting electrical components at the service panel. The article also gave general points to look for within the panel inspection.
I found it interesting that you do not only have to inspect the panel itself, but that the inspection encompasses the surrounding area. You have to make sure that there is a thirty inch horizontal working space as well as a six foot vertical working space with which to access the service panel. The way that the panel is fastened to the wall, and which types of fasteners are used are important to look for. Anything having to do with the safety of a person having to access the panel have to be included within a report, not just issues that affect the electrical performance of the houses electrical system.