Same parameters as last post:
Temp inside: 72-74, humidity inside: 39%, temp outside: low 50s
Same parameters as last post:
Temp inside: 72-74, humidity inside: 39%, temp outside: low 50s
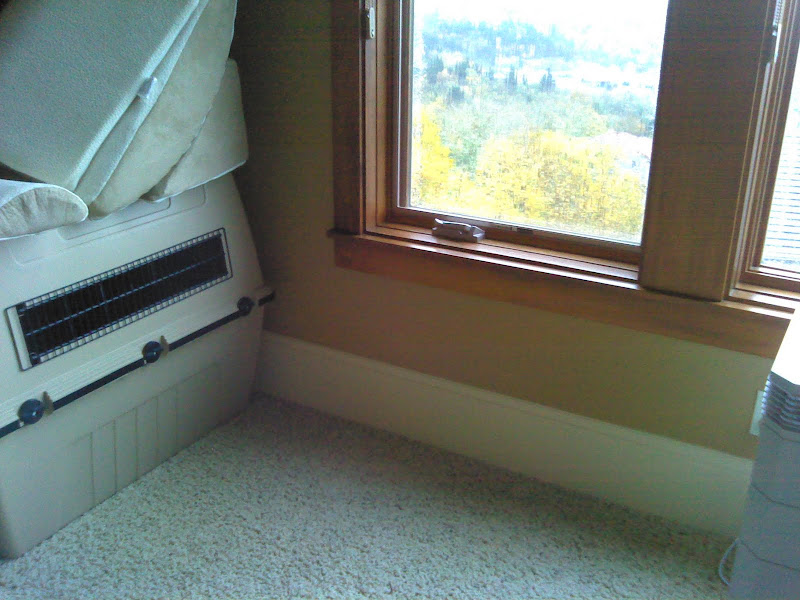
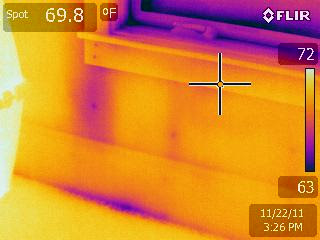
I take an uneducated stab at it. Cold air falling from a window leak would also chill the base board. It appears the baseboard is insulating against some of the infiltration.
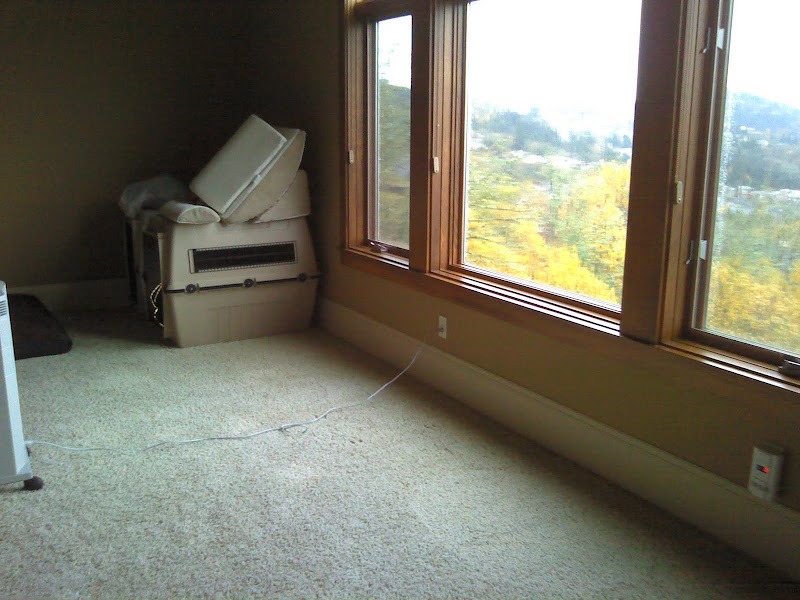
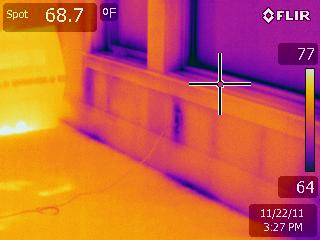
Looks to me like there is rim joist leakage at the baseboard. Several window jacks make up the vertical lines under the first window. A leaky receptacle is the culprit under the large window.
Most windows are improperly installed due to the lack of backer rod and sealant around the window on the exterior.
Plan is to remove the whitewood (ick) trim around all the window banks that have Southern exposure (1000’ elevation too) and replace with Hardie with 3/8" gaps, backer rod, and Sonolastic 150. Reflash as well.
Still trying to figure out if this window is actually leaking or not…Will remove the wood trim soon. I keep doing that for other window banks and keep finding missing sections of drywall where there was a previous repair…scary.
Moisture meter readings – both EM and invasive – are quite good all over…EM shows 3-5 on the drywall, 6-8 on the wood trim, and sometimes 10 around the nail heads :). No evidence from the meters of leakage.
Meters are Delmhorst and Wagner.
-mark
How do you flash under the sill and out over the cladding?
Kinda curious … You see the cooler area at the studs in the wall and at the baseboard - rim - floor as always. Where exactly was the water leak.
Mark, a few suggestions.
If the moisture meeter is reading only 3-5 and 6-8 are you sure you have a water intrusion problem?
Is 3/8 hardiplank trim a good solution? What is the profile of the siding. I cant tell from your picture but it looks like vinyl with cedar shakes on top. If so I would make sure that the window trim extends past the siding detail, in the case of vinyl and shakes I would use 5/4 stock and by the looks of the window wall I would go with a low maintenance material such as PVC. Flashing should be used not only on top of the window casing/header but on top of the window itself. Also, eliminate the caulking. Caulking is no substitute for flashing. If you caulk these windows they will only be destined to fail again. Finally, the trim detail needs to change on the center window. Both ends of the header casing look like a good entry point. I would increase the elevation of the trim so it’s a solid piece all the way across the lower windows. The detail that I see in your picture is very difficult to flash and the corners where the lower trim meets the header is a good place for water to enter.
Before I did all the above, and the fact of the low moisture readings would guide me in this direction first, I would remove the interior drywall under the window and check for air infiltration. A simple solution, if this area is dry inside the wall cavity, is to buy a large container of two part spray foam and not only air seal the cavities but insulate them as well. Once this is completed re-scan the windows to see if you were successful.
My comments are based on very limited info. that you have provide but I have worked on many window walls myself. If you want to talk feel free to give me a call, I would be more than happy to talk.
Good info, Peter…
Windows with trim around them need three pieces of flashing. imo
The head of the window out and bent over the edge of the vertical trim on the window.
The same at the trim above the head of the window.
Under the sill behind the trim under the window and out over the cladding!
Caulk and backer rod on the sides and between the window and the trim under the sill.
Kinda like these.
http://www.badstucco.com/properflash/properflash.html
Any water that is in can get out over the cladding.
A lot of the ones around here have no flashing and no moisture barrier under the trim.
The flashing that is under the sill and out over the cladding needs end damns on it.
Never 45 the trim around openings, might end up looking like this.


Can someone tell (or show) me how to tell the difference between an air and moisture anomaly with Thermal Imaging without using a moisture meter?
It seems that we have as much trouble with the moisture meters as the thermal cameras.
I would think this a air filtration nothing more. I see a outlet, Most likely Insulation has been displaced by the sparky. Wire feed from underside?
Yes, no backer rod and/or good sealant, such as Sonolastic 150. The gap is non-existant today - that will be part of the repairs.
Current repair strategy is:
Ideal strategy would be to install a rain-screen, but that isn’t happening.
1000’ elevation, high winds, coastal-like exposures
Like I posted in another thread, having a Cam without all the necessary instruments to go with it…the Cam is basically worthless.
some guys are overwhelmed by the real deal and prefer the inflatable gf…
I have a method (actually 2 methods) to tell with just the IR camera if it is air or moisture.
I will share the process in New Orleans with those present.
I am making a video of it, but then John can fill us in from here at NACHI for those that want to know.
Just ask him.
I will have to disagree with you, there is “no” absolute method to determine the difference on “every” occasion that it “could or is” moisture or air without the use of other instruments, on every occasion.
If you can show me how this is possible on “every” instance whether it “is” moisture or air without any other instruments…I would surely like to learn this knowledge—![]()
Its especially difficult in the Phoenix area…VERY difficult.